CALIPER AND CALIPER GAUGE

The folding rule is a favourite measuring tool for many craftsmen, especially in metalworking. If you need to be precise, then calipers can help. Calipers have a display accuracy of up to 0.01 mm. They can be used to precisely measure internal and external dimensions. Most calipers also allow the depth dimension to be determined precisely.
Despite their flexibility, calipers are usually unable to measure depth and internal dimensions precisely. These values, on the other hand, can be precisely determined on calipers - these cannot be beaten for accuracy in the trade.
We have summarised the most important information about calipers for you in the following sections.
What types of calipers are there?
Calipers can basically be divided into three categories:
- Analogue caliper - usually with vernier
- Caliper with analogue clock / clock caliper or clock caliper
- Digital caliper gauge / digital caliper gauge
A classic analogue caliper gauge does not allow quite as much precision as the other calipers - it is usually perfectly adequate for the carpenter's workshop. Operation is more difficult than with other models - you first have to learn how to use the vernier. Measuring accuracies between 0.02 mm and 0.05 mm are common.
Classic analogue caliper gauge - here with vernier.

The clock caliper is easier to use and displays the 1/100 mm of the measured value on the large round scale. The clock display (the dial gauge) is accurate enough to differentiate between the various values. Disadvantage: The sensitive mechanism can suffer in tough everyday workshop conditions, for example in a metalworking shop.
Clock caliper - simple operation, sensitive mechanism.

A digital caliper gauge can be used completely intuitively, which also offers a precision of up to 0.01 mm. Without adding up the values of the different scales (ruler + vernier or ruler + clock scale), the measured value is shown on the display with decimal places down to 1/100 mm. In addition, some digital calipers can also switch between inches and millimetres. The ease of use is particularly useful when even inexperienced people need to read the measured values. The digital display is the easiest to use here. Disadvantage: Its battery is usually empty exactly when it is needed.
Digital calipers - high precision and easy to read.

A special form - a caliper gauge in cheque card format.

How do you read the vernier scale?
The vernier is the additional scale that makes it possible to measure the spaces between two lines on the main scale with greater accuracy. Above a certain line density, it is difficult for the eye to distinguish between the individual lines. The vernier makes it possible to increase the reading accuracy precisely yet conveniently.
To read the vernier exactly, you must look down vertically at the vernier. First read off the last integer value of the main scale before the 0 of the vernier scale. Then find the line on the vernier scale that extends any line on the main scale. This applies to the vernier scale value. For example, in the scales 1/100, 1/20 or 1/10.
In the first step, read the main scale - the last value of the main scale before the 0 of the vernier scale (28) applies. In the second step, find the line on the vernier scale that exactly extends any line on the main scale (85). This corresponds to the value determined with the vernier scale. The measurement result is therefore 28.85 mm.

What material should the calliper gauge be made of?
Basically, you can choose between calipers made of metal or plastic. Metal calipers are characterised by a longer service life and are also slightly less sensitive to impacts. The advantage of calipers made of plastic is that they are lighter and less likely to scratch sensitive surfaces. Also for electronic components.
Which caliper gauge is the right one?
Which caliper gauge you choose depends on your personal preferences as well as the accuracy of the display. There are many craftsmen who swear by analogue calipers made of stainless steel. These are robust and, with a little practice in reading the vernier, are accurate enough for most tasks. For others, it is more important that they do not leave any scratches on the surface of their measuring pieces with the caliper and therefore choose plastic calipers. If you want it to be simple, convenient and very accurate, choose a digital caliper - and find it easier to read. Also pay attention to how long the caliper needs to be so that you cover the measuring range that is relevant for you in your daily work.
What is the difference between calipers and callipers?
The measuring tool is referred to as a caliper gauge in accordance with DIN 862. In contrast to a measuring tool, a gauge is used to reproduce a value that has been measured/determined once. Well-known examples of this are the internal and external calipers used in woodturning. Many calipers have a locking screw for this purpose, with which the measuring head can be fixed. By fixing the caliper, it becomes a gauge - and can be used to compare any number of parts with the previously measured and fixed value.
What can you measure with calipers?
A caliper gauge is more flexible than it appears at first glance. In fact, four different measurements are possible with it.
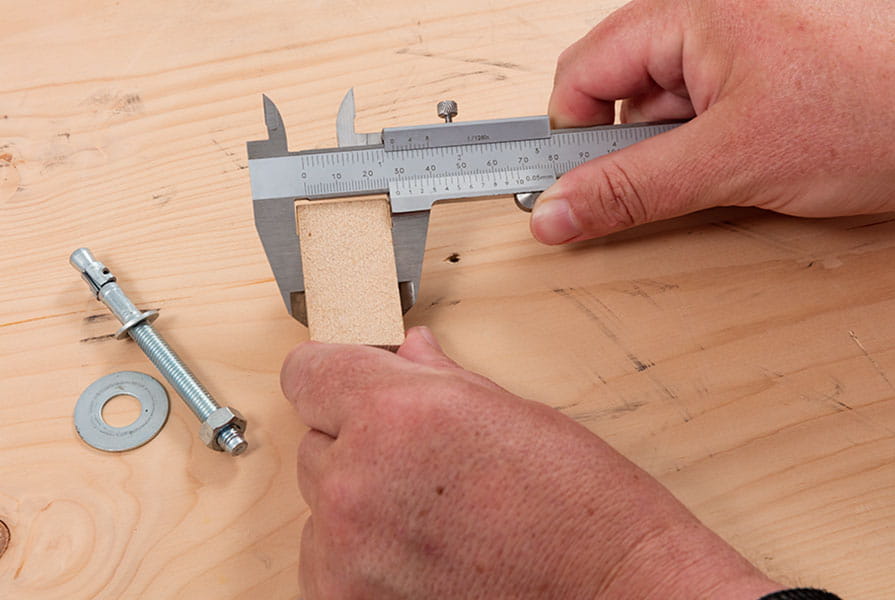
- External measurement - the workpiece to be measured is gripped by the measuring jaws.
- Internal measurement - this is carried out with the measuring beak. This is pushed into a hole, for example, to check whether it really has the desired dimensions.
- Depth measurement - the mandrel at the end of the caliper is pushed into a hole and measured.
- Step measurement - here the fixed measuring leg is placed on the step and the movable measuring leg is then pushed up to the step and placed on it.
What tips are there for measuring with calipers?
- The calipers have been calibrated at a temperature of 20 degrees Celsius (see specification on the ruler). They are accurate at this temperature.
- Do not just measure with the tip, but move the workpiece as far as possible along the ruler into the calliper gauge.
- Do not exert any pressure on the device when measuring. Different forces lead to different results, even with solid workpieces.
- If you want to measure a workpiece in a place that is difficult to access: After placing the calliper gauge on the workpiece, fix the calliper gauge in place with the fixing screw. Read the result when you can see the scale better.
- Always measure at right angles to the object axis to avoid distortions caused by diagonal measurements. Do not tilt the calliper gauge.
- You can score soft metals such as brass, copper or aluminium directly with the end of the measuring jaws. This avoids errors, e.g. caused by a scriber needle held at an angle.
- When measuring depth, make sure that you lower the caliper vertically to the deepest point.
- Clean holes and joints and blow them out before measuring if necessary.
- Take great care to ensure that no dirt collects between the arms of the calliper gauge.


