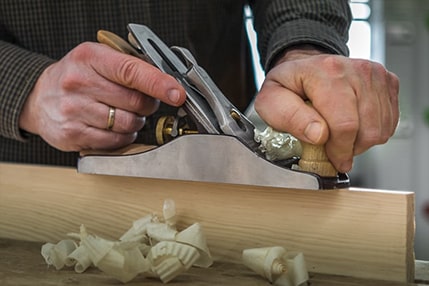
Shaving plane

When it comes to smoothing curved workpieces, creating fine transitions between straight and rounded edges or adding a bevelled edge to curved workpieces, there is no better tool than the tail plane. Shaving planes, draw planes and shapers are available in different shapes and sizes. In this article, we take a closer look at the most commonly used metal models with straight and rounded planer soles.
What kind of tool is a tapered plane?
As their name makes clear, these planes are ideal for shaping curved workpieces. The English term "spokeshave" is also more indicative of the application, as these planes were and are used to mould wooden spokes in carriage building. The term "shaving plane" is misleading, as it does not shave off the wood fibres but cuts them, just like normal hand planes for woodworking.
Strictly speaking, they are normal planes, but they can follow curves very well due to their very short sole and the handles attached to the side. Shaving planes are also ideal for applying a bevel of varying width to curved workpieces. Basically, they are made for the same applications as simple draw knives. Wooden moulding knives or wooden shaving planes in particular work like draw knives with a chip thickness limiter and are guided in a similar way. However, the surfaces to be worked on are usually smaller and the desired result finer.
However, there are also "real" scrapers, such as scratch stock and moulding scrapers, which use a profiled scraper blade, or, for example, the veneer scraper from Veritas (see Stanley No. 80), where the scraper blade is inclined beyond the vertical to 110° and is intended for cleaning heavily textured woods.
Why are there different soleplates for tail planes?
To put it simply, a moulding plane with a straight sole is intended for convex shapes (external curves) and one with a rounded sole for concave shapes (internal curves).
However, a tail plane with a rounded sole is also suitable for external curves. However, handling is then somewhat more difficult. A moulding plane with a straight sole can also be used to process internal curves if they have a slightly flatter radius. Most moulding planes with a rounded sole have a small straight surface in the area of the plane blade. Only a few are actually completely rounded and even with these planes, the rounding in the centre is significantly flatter. This small surface makes it easier to work convex shapes (external curves) with a tail plane with a rounded sole.
A tail plane with a concave sole is used to round off corners and to produce round workpieces, e.g. table and chair legs. As this can also be done with the other two plane sole shapes, it is rarely used or only by craftsmen who regularly carry out such work.
Fig.: Three different plane soles: straight, rounded and concave

How to adjust a tail plane?
The first thing to do before edge processing or after sharpening is to set the chip thickness. For tail planes with adjusting screws, the iron setting is almost self-explanatory. It is important that the clamping of the iron is loosened slightly for adjustment and then tightened again. If the chip thickness is reduced, the knurled screws should be turned forwards again after resetting until they rest against the front edge of the recess so that the iron does not move again unintentionally with the first cut.
Planes without adjusting screws are placed on a flat and clean wood surface and the plane body is pressed down firmly so that the front and rear edges of the plane mouth rest on the surface or a straight plane sole rests on the entire surface of the wood. Then insert the plane iron into the plane body and bring the cutting edge into contact with the wood surface and clamp the iron firmly. If the chip is too thin, the iron is driven out of the plane by lightly tapping the rear edge with an adjusting hammer. If the chip is too thick, the iron is released again, pulled back and the adjustment is started again from the beginning.
Tip: Some craftsmen do not set the iron parallel, but at a slight angle to the plane sole, so that chips of different thicknesses can be removed across the width of the iron. This considerably simplifies the processing of concave-convex curved edges, as the chip thickness does not have to be constantly readjusted.
How is a tail plane used correctly?
Tail planes can be used both in tension and in compression. As with all planes, a tail plane must always be planed with the grain direction, processing is particularly difficult at the point of the rounding where the grain direction changes. Here, the planing direction must be changed back and forth frequently. This is much easier if only the planer is rotated rather than having to turn the workpiece or stand on the other side of the workpiece each time.
Fig.: Tail planer on pull

A tail planer can be used for pressure or tension, depending on the fibre flow.
Fig.: Tail plane on pressure

How can chatter marks be avoided?
If the tail plane leaves chatter marks when planing, this can have various causes. The chatter marks occur when the cutting edge gets caught in the cut, then immediately comes loose again and this is repeated in rapid succession. This is either caused by vibrations of the workpiece, which should then be clamped more firmly, or by vibrations of the plane iron, which is too thin or does not rest properly on the plane body or in the iron bed. There is also a high risk of chatter marks occurring on planes with a very large gullet and thick chip removal. To eliminate chatter marks, you should first try to eliminate the cause. Then change the orientation of the plane to the chatter marks by guiding it diagonally to their course. If you continue to hold the plane parallel to the chatter marks, they will tend to become even more pronounced.
How can I optimise my tail plane?
Round off sharp edges. Some planes with a straight sole have very sharp front and rear edges that cut into the surface when planing concave curves. You can round off the sharp edges of these planes with a file and then smooth them with fine sandpaper.
Polish the sole of the plane. It can also happen that the surface of the soleplate is only very roughly sanded. These planes will glide more easily if you polish the metal soleplate with 320, 400 and 600 grit sandpaper.
Adjust the size of the planer mouth. The size of the planer mouth also has an effect on handling. The smaller the planer mouth, the easier it is to use and the cleaner the surface. However, a planer with a small planer mouth only allows a small amount of material to be removed and correspondingly thin chips. The size of the planer mouth cannot be adjusted directly. In the case of tail planes with too large a mouth, you can "reduce" it by shimming the iron. However, this requires metal (sheet metal) shims. Wood or plastic would be too soft and the plane would have an increased tendency to rattle. If possible, the supports cut from sheet metal should cover the entire contact surface of the plane iron so that it rests cleanly and does not wobble. If the mouth of the plane is too narrow and chips are constantly getting caught in it, you can carefully open it up a little with a fine file.
How to sharpen a tail plane?
Tail planes with straight plane irons can be sharpened and honed on water stones or on grinders like other planes. However, it can be somewhat difficult to hold very short plane blades at the correct angle. We therefore recommend using a suitable grinding guide. Tip: You can use the iron and flap of a finishing or plastering plane as a sharpening guide. The short tail plane iron is simply placed between the flap or chip breaker and the cleaning plane iron and clamped in place.
Conclusion
Tail planes are versatile tools for shaping. They can be used to chamfer and round edges and to finish the surfaces of curved workpieces.
The shape of the planer sole determines whether the planer can mainly be used to machine internal or external curves.
Planes with an adjusting screw are comparatively easy to adjust. It is important that thin chips are removed to avoid chatter marks.
Unsere Top Auswahl für die Holzbearbeitung


In our online shop you will find high-quality tail planers from Veritas, Clifton and DICTUM, as well as matching replacement irons and accessories.
Folgende Beiträge könnten Sie interessieren