Shaving horses / workbenches
-
Woodworking / metalworking
- Saws
- Chisels
- Carving tools
- Axes and hatchets
- Hammers, nails & pry bars
- Planes
- Woodturning tools & lathes
- Rasps & files
- Measuring and inspection tools
- Scribing & cutting tools
- Routing & drilling tools
- Clamps
- Screwdriving tools
- Pliers
- Workshop equipment & tool sets
- Blacksmithing / blade finishing
- Engraving tools
- Leatherworking, papercraft & upholstery tools
- Stone working tools
- Tools for kids
Shaving horses / workbenches
EXPERTENWISSEN ABZIEHLEDER
It's the height that counts
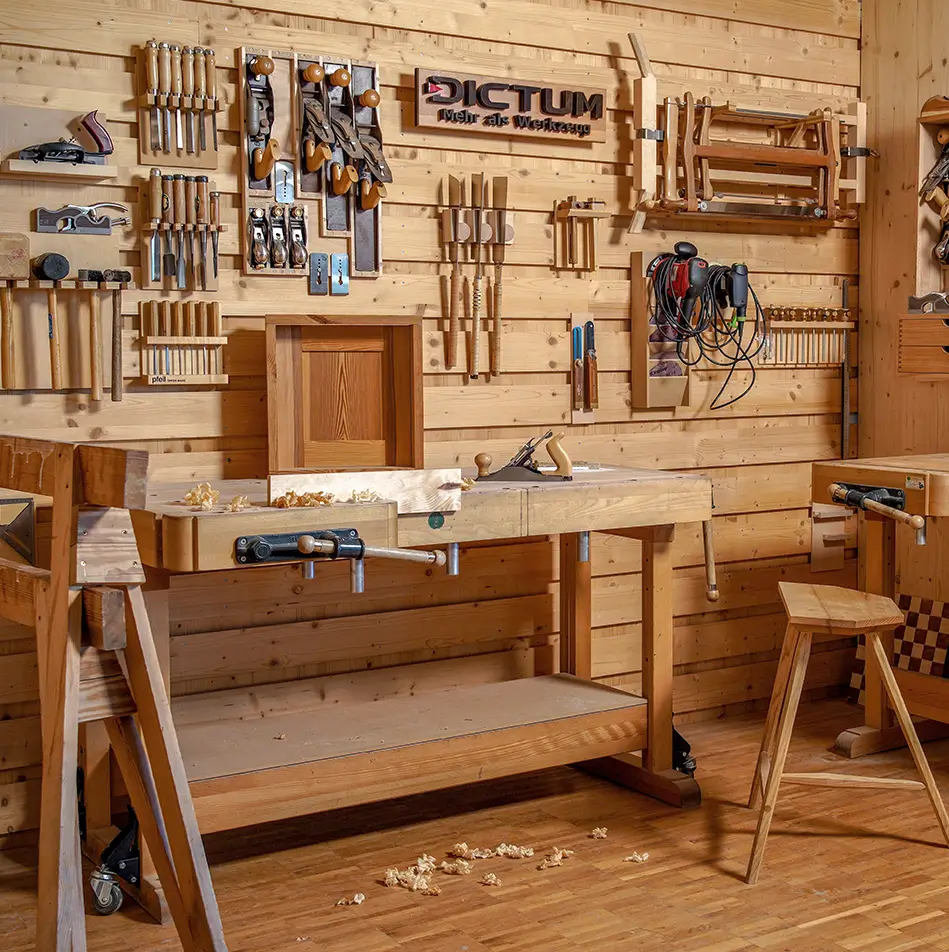
In order to work as ergonomically as possible and therefore also protect your back, the working height of the workbench must be tailored to the respective craftsman and his personal preferences. The following applies: If you are standing in front of the workbench with your arms hanging loosely, the upper edge of the bench top should be approximately at wrist-ankle height. A higher work surface is generally more comfortable when working with machines. To adjust the working height, either place beams or squared timbers under the workbench or use a so-called top clamp. Please note that placing the workbench underneath only works if there is sufficient Weight.
Own weight as an important quality feature
Chiselling, planing and sawing require a stable base. The greater the weight of the workbench, the better its stability. The Weight of most workbenches is mainly in the worktop. This should be correspondingly heavy so that it can be chiselled, hammered and planed with ease and power. The base frame should also be solidly constructed to ensure good bracing. In this way, vertical forces are absorbed and transferred to the floor. Screwing the workbench to the floor is not only a bad solution, it is not a solution at all. You must be able to move the workbench around the workshop. The workbench should be accessible from all sides, especially when working on larger workpieces. A firmly bolted bench is also a hindrance when cleaning the work area.
Mobile working on castors
High-quality workbenches are very difficult to move due to their heavy weight. In order to position the workbench flexibly and as required in the workplace, it is advisable to place it on castors. It is important that the castors are designed for the high Weight and the massive load and can be folded down. This makes it possible for the workbench to stand stably on "its own legs" during work.
The advantages of a "rolling workbench" speak for themselves:
- More possible uses: The workbench can be moved at any time - depending on where it is needed in the workshop.
- Better accessibility: If the workbench is free-standing in the room, the carpenter can reach the workpiece from all sides and thus process the surface better or assemble larger pieces of furniture more quickly.
- Maximum flexibility: The workbench on castors can be set up and dismantled quickly. This encourages spontaneity, expands the scope for design and motivates the craftsman to start and continue smaller projects.
The various clamping options
A functioning and good gripper mechanism is an absolute must. The majority of planing benches have two tongs: a front tong and a rear tong. These are used to clamp workpieces. This can be done both vertically and horizontally in conjunction with bench hooks on the bench top.
A standard workbench must offer a suitable clamping option for the following three areas of application: surface processing (planing, sanding), end face processing (slotting, tining) and edge processing (joining, profiling).
- Processing the surfaces: The carpenter usually clamps the workpiece between the bench hooks using the back clamp. Workpieces can also be fixed to the workbench with the help of so-called hold-down clamps, which are inserted into suitable holes in the work surface.
- Processing the front sides: The workpiece is clamped in the front clamp. Please note that the front clamps with only one spindle can warp if the workpiece is clamped off-centre. Warping can be avoided by clamping a piece of wood of the same thickness (e.g. a section of the workpiece) on the other side of the front clamp. Some planing benches therefore have one or two equalising screws (abutments) built into the front clamp.
- Processing the edges: The workpiece is also clamped in the front tongs and shimmed at the rear end. If the workbench also has holes in the front edge of the panel, shorter workpieces can be clamped against the panel with hold-down clamps. Narrow, long parts are supported at the rear end by clamping a wooden block in the rear clamp, on which the workpiece then rests.
Tools always to hand
With a simple clipboard directly on the workbench, you always have the tools and work materials you need quickly to hand. It is usually just a simple board on the crossbars of the frame, which makes individual work steps much easier and therefore faster.
You should pay attention to the following points for the storage surface:
- Only use the Tools on the workbench that you need for the current work. The remaining tools should be stored and organised in a tool box, tool cabinet or tool wall.
- The space below the bench top should not be used for storage, such as a tool cabinet or drawer.
- A bench drawer or side drawer at the back of the bench top makes it possible to quickly remove tools from the top that may be needed again in the next work step.
Want to find out more?
You can find more information about workbenches and your workshop on our blog.


