
We answer questions about band saws and band saw blades
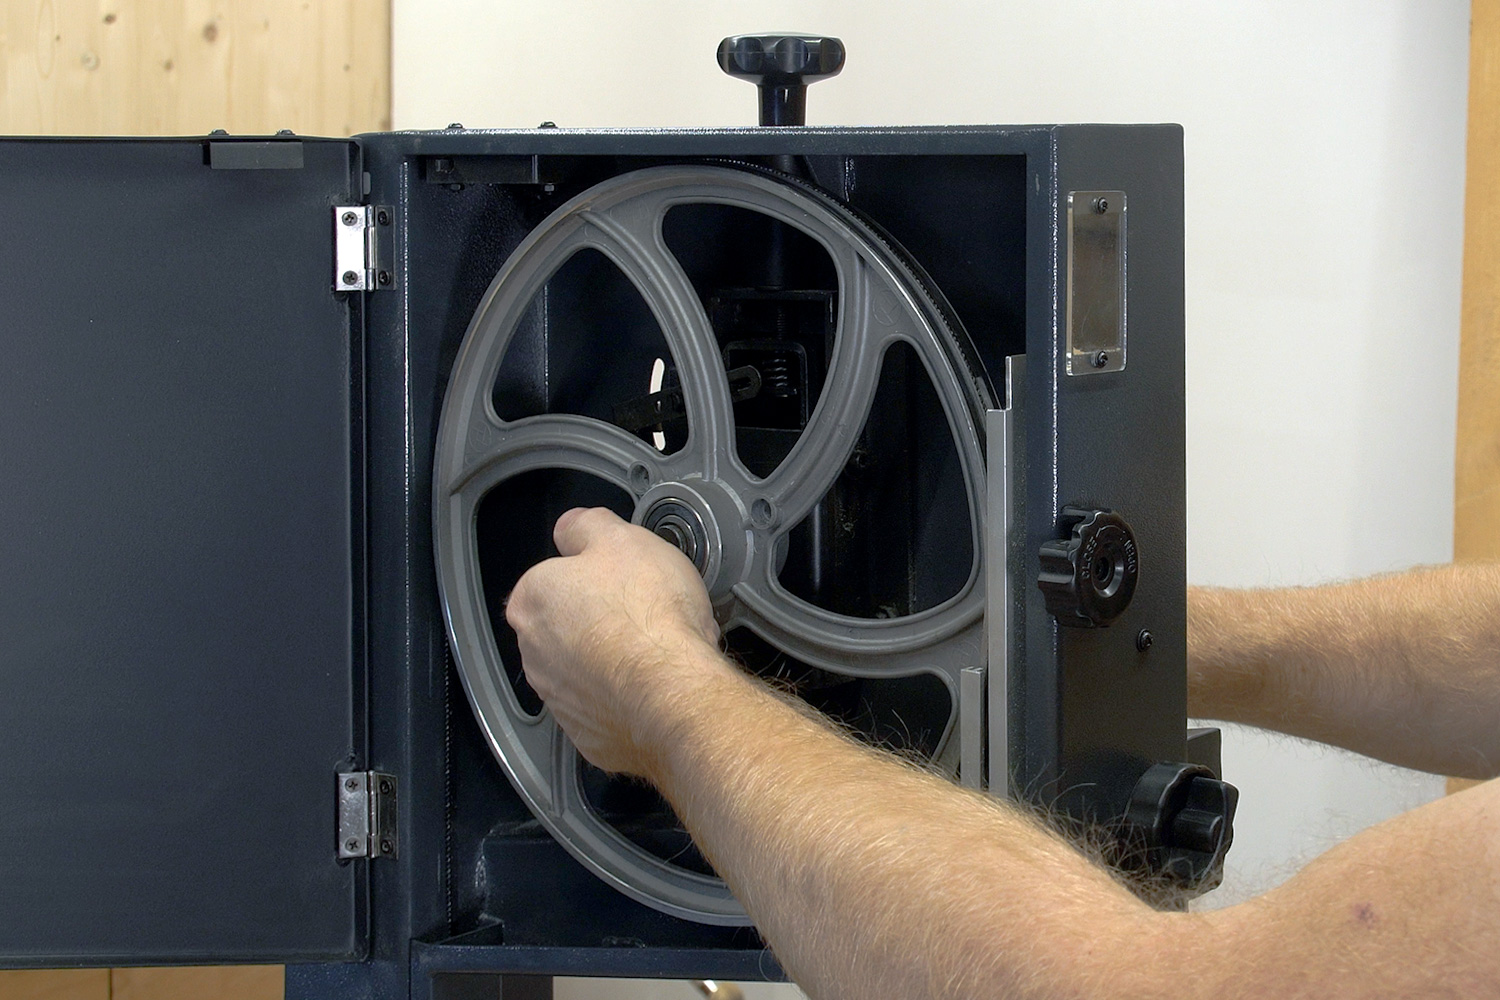
In response to our last articles on the subject of band saws, we received several comments with similar questions, which we would like to answer here.
How is the tension of the band saw set correctly?
The rule of thumb is: as high as necessary and as low as possible. In order to understand this statement, it is important to know what loads a band saw blade is exposed to. Each saw blade must have a certain amount of tension so that the saw cut follows the rip and does not run. On a frame saw, this tension is created by a tension wire or a tension cord; on a fret saw, it is created by the bracket. On fine saws, the back stiffens the saw blade and on a circular saw, the saw blade is additionally stabilised by the centrifugal forces. To ensure that the saw cut on a band saw does not run, the saw blade also needs sufficient tension. To achieve this, the band saw must have a stable frame that allows sufficient tension to be built up. DICTUM band saws therefore have a solid, partially reinforced steel frame.
The band saw blade of a band saw is subjected to a correspondingly high tensile load. This tensile load is particularly critical at the joint where the band saw blade is welded together. In addition, a band saw blade is bent as it travels over the rollers and straightened or stretched again in the freewheel area in between. If a band saw blade is not regularly slackened, it stretches over time, which leads to material fatigue.
It is therefore important that you relax the saw blade when the band saw is not being used. To do this, the blade tension is reduced using the handwheel on the upper impeller. On larger band saws (e.g. DICTUM BS 360-14), the saw blade can be easily tensioned and released using a lever mechanism. Tip: Then place a board or sign with the warning "Caution! Saw blade is untensioned!" on the machine table. This is particularly important if other people are also working with the band saw.
How tight must the band saw blade be tensioned?
To put it simply: so tight that the saw cut does not run. Whether the saw cut runs depends on the following factors:
- What material is being sawn: hardwood or softwood, even or irregular grain, knots
- What is the material thickness? Thin board or thick plank
- Which saw cut is made? Straight cut or curved cut with a tight radius
- Which saw blade is used? Blade width and thickness, toothing (tooth shape, tooth pitch, set)
- Is the band saw blade freshly sharpened and clean?
How can I tell if the band tension is correct?
Some bandsaws have indicators on which you can read the belt tension. These indicators do not give an exact measured value (e.g. kg/cm2), but only an approximate guide value based on the standard length and width of the selected saw blade. The sound that is produced when the saw blade is plucked only indicates that a certain amount of tension is present. However, its sound says nothing about whether the band tension is sufficient. Only by making a few test cuts can you really check whether the tension of the saw blade is correct.
Indicators help when setting the band tension
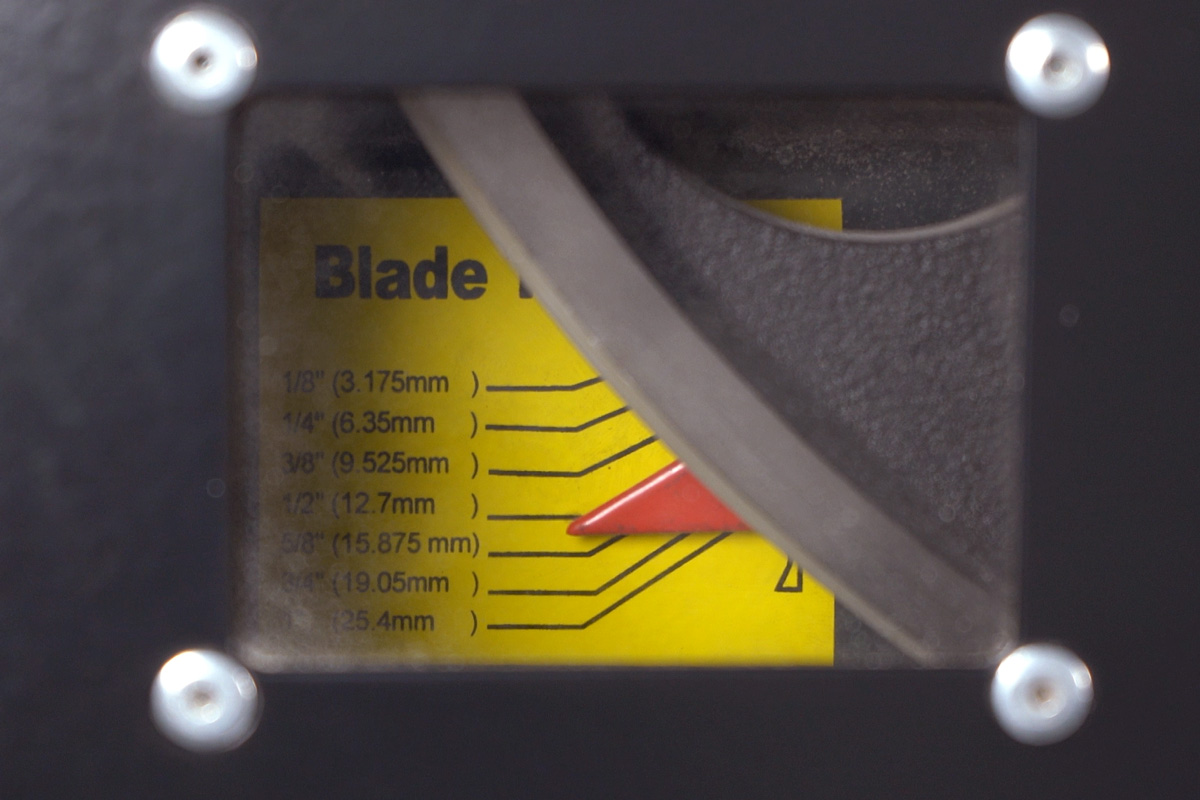
The saw blade is sufficiently tensioned if the saw cut can be easily controlled in the longitudinal direction or in the cutting direction (i.e. the saw blade does not twist sideways unintentionally) and is angled in height or over the entire material thickness and does not run.
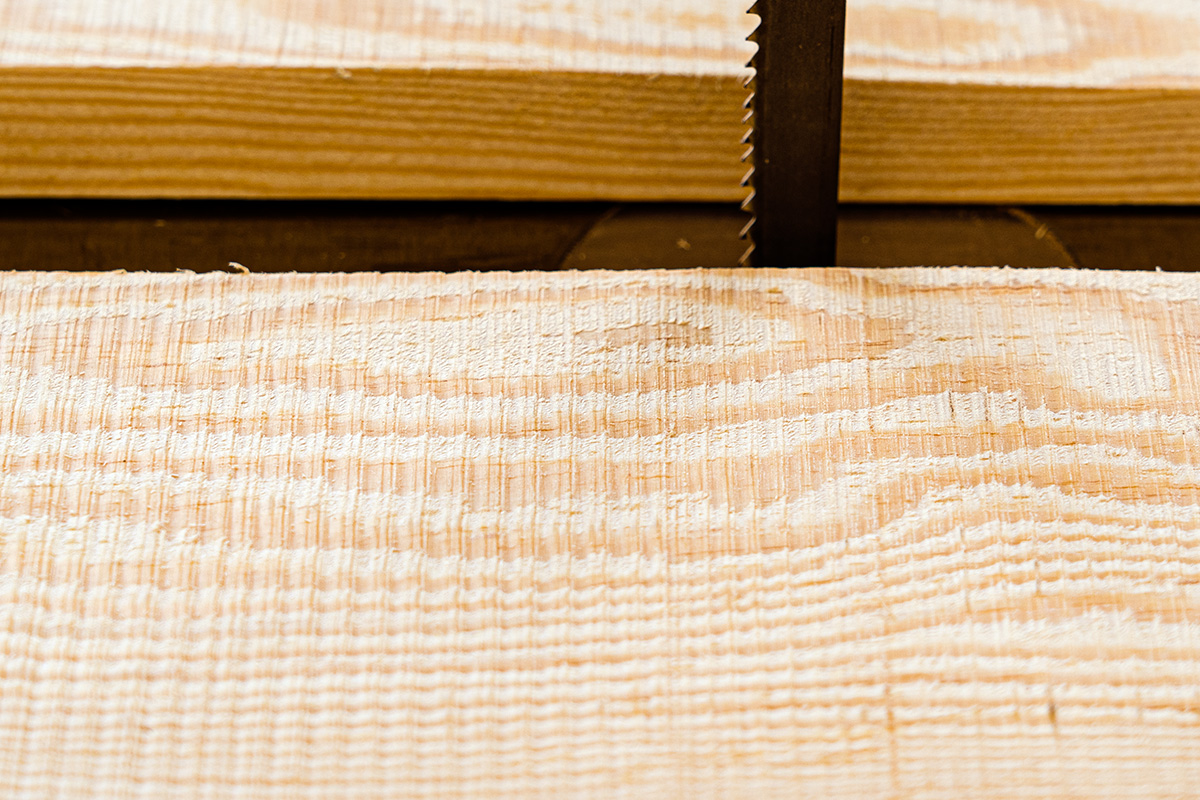
You can recognise insufficient blade tension by so-called "chatter marks" (repetitive vertical saw marks), which are caused by vibrations or lateral fluttering. Even if the saw cut does not run at a right angle through the material, i.e. the saw blade can deflect sideways upwards or downwards, this is a clear sign of insufficient tension (provided the blade guide and saw table are correctly adjusted).
But be careful: The saw cut can also run and chatter marks can have other causes. For example, if pressure is applied sideways during curved cuts instead of rotating the workpiece, if the feed speed is too high or if the saw blade is blunt or gummy, the quality of the saw cut can also suffer. In general, it is important that the saw blade is set correctly and sufficiently. Saw blades that are set on one side always run!
Such vertical saw marks are a sign that the blade tension is too low
It is not so easy to recognise if the belt tension is too high. The wear on the roller drums is then very high and the saw blade cuts into the plastic. If the tension is too high, the band saw starts up more slowly, makes unusual noises and ultimately the band saw blade breaks.
Where should the saw blade sit on the rollers?
This question was also asked after our last posts, and we were sometimes sharply criticised for our videos and the settings shown in them.
On old bandsaws, the contact surfaces of the rollers were usually flat and often only covered with a thin layer of cork or rubber or bare metal. In order to protect the saw teeth and maintain their set, the position of the saw blade was chosen so that the saw teeth protruded at the front over the rollers or the rubber support.
Old and modern rollers in comparison
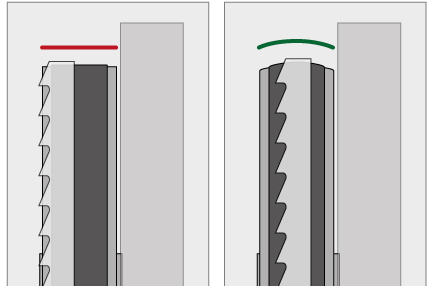
The rollers on modern band saws are "cambered", i.e. their running surfaces are slightly convex and they usually have a thicker plastic coating. On modern machines, the saw blade should therefore sit in the centre of the roller so that it rests completely on it. This position is easier to adjust and, above all, much safer, as the saw blade cannot jump forwards off the rollers so easily.
What is the maximum cutting height?
As already mentioned in the previous articles, many manufacturers specify the maximum cutting height as the largest possible clearance between the saw table and the upper saw blade guide. However, the actual cutting height that can be realised depends largely on the following factors:
- Passage height
- Motor power
- Saw blade and toothing
- Material
- Feed speed
The clearance height determines the maximum height that a workpiece may have in order to fit between the saw table and the upper saw blade guide. The motor power is decisive for the force with which the saw blade is pulled through the material. The saw blade must be stable enough that it can be tensioned sufficiently so that it does not run over the height. Its teeth must be well set so that the saw blade can cut itself free and it must have sufficiently large chip spaces to be able to transport the loosened wood fibres through the entire height of the material without any problems. A wide and coarsely toothed saw blade is always required for cutting thicker material. Hardwoods are often easier to cut than softwoods. As soft woods such as pine or spruce are very resinous, they clog the saw blade more quickly and block the chip spaces. Even with a new, sharp saw blade, the cutting performance quickly deteriorates. Ultimately, your skills will also determine the possible cutting height.
The maximum cutting height corresponds to approx. 70 % of the clearance height
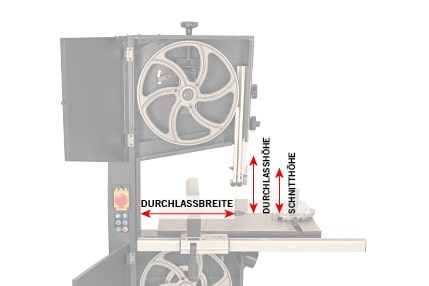
For thick materials, work with an adapted feed rate. Bear in mind that the saw blade has to travel a much longer distance through the wood before it can release the cut chips.
As a rule, you can assume that the maximum cutting height corresponds to around 70 % of the clearance height and that the bandsaw's motor power is designed for this material thickness. For example, if you intend to regularly rip boards with a height of 120 mm, the cutting height or clearance height should be slightly more than 170 mm.


