
Last-minute gift packaging
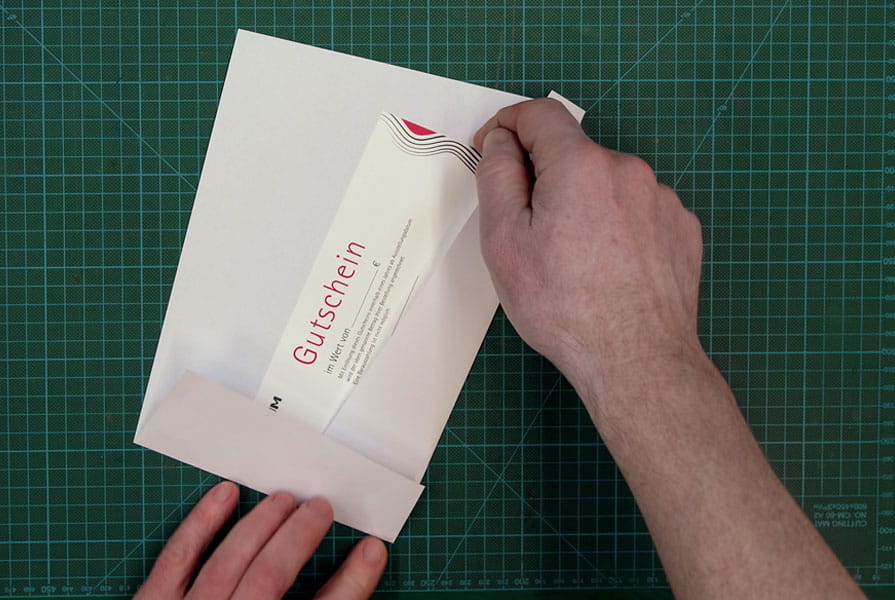
Got a present, but no wrapping, no wrapping paper, no envelope to hand? Don't panic! We'll give you simple tips on how to wrap gift vouchers at the last minute and personalise gifts of money. We not only fold envelopes from simple copy paper, but also trays for biscuits and snacks. And with the so-called "Jackson Cube" you can surprise your guests with the unusual gift packaging.
Materials and tools
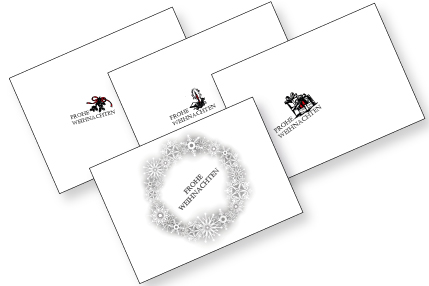
All you need for wrapping is normal printer or copier paper. Depending on the size of the gift, normal office paper in DIN A4 or DIN A3 format will suffice. If you wish, you can print our Christmas motifs on the paper. Motifs 1 to 3 are suitable for all the envelopes shown and the "Jackson Cube". Motif 4 is ideal for the biscuit tray and the long DIN envelopes.
Click here to download templates as PDF.
Envelopes and envelopes
Would you like to wrap a DICTUM® gift voucher but don't have a suitable envelope? Do you find cash impersonal and would like to wrap it as a personalised cash gift? With the following folding techniques you can fold envelopes for vouchers or letters in A6 or long DIN format from normal A4 paper.
A. for approx. DIN A6
The basic principle of this folding technique works as follows: Mark any point on the sheet (A). Now simply place an edge exactly on this point and fold the resulting edge (B). The fold can be at an angle, it does not have to be parallel to the edge of the paper. Now take the next edge and place it on the point (C) as well. The corner of the previously folded edge must lie as precisely as possible on the fold so that the new fold is exactly at right angles to the first fold. Repeat this with the other two edges (D-E).
Fig. 1: Folding the envelope to approx. A6 format.
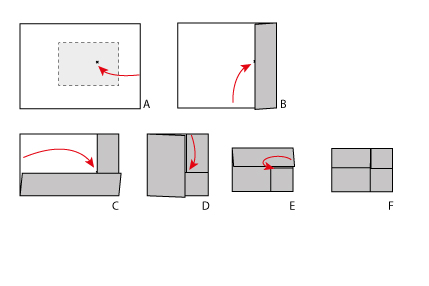
To ensure that the envelope remains closed by itself, tuck the last corner under the first corner (F). Depending on the direction in which the envelope is folded, the inside of the paper will be visible at the corners. This can be very attractive if two-coloured or differently printed paper is used.
B. for approx. DIN long (DICTUM® voucher)
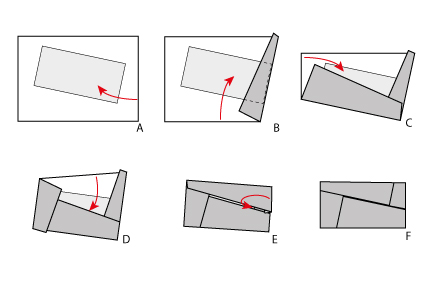
You can use the same folding technique to wrap a voucher in DIN long format. The only difference is that you orientate yourself to the format of the voucher. Place the voucher on the sheet of paper and fold one edge over it (A). Fold the edge (B). Now fold the remaining edges onto the voucher exactly as before (C-E) and tuck the last corner inwards (F).
Fig. 2: Folding an envelope for a long DIN voucher.
Paper bowl for biscuits and snacks
Would you like to give home-baked biscuits as a gift but don't have any plates to spare? You don't have enough bowls to offer different snacks separately at your party? You can also solve this problem elegantly with A4 paper.
Fig. 3: Folding the paper bowl, centre cross and diagonals.
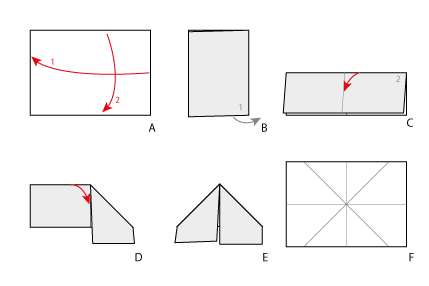
Fold an A4 sheet first on the short side, then on the long side in the centre (Fig. 3 A-C). Fold the folded long edge from the right and left at a 45° angle onto the short centre fold (3 D-E). Unfold the paper. You now have two crosses on the sheet, one normal and one rotated by 45° (F).
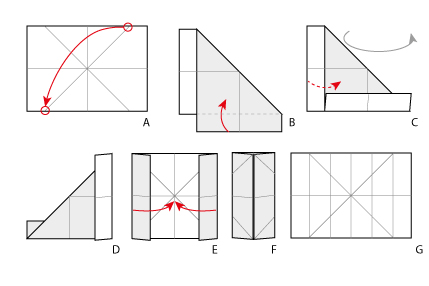
Fold the diagonals together and fold the protruding flaps over to the other side (Fig. 4 A-D). Unfold everything again. Now fold the short sides with the crease of the flaps towards the centre (4 E-F). Unfold everything (4 G).
Fig. 4: Folding the paper bowl, 6-part division.
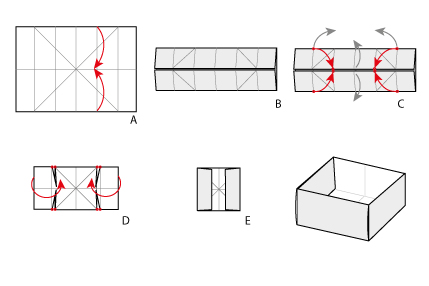
Now fold both long edges to the centre line (Fig. 5 A-B). Now you can "unfold" the bowl. To do this, first fold up one short side on the second fold from the outside and open the long edges at the same time (5 C-D). The diagonal folds fold inwards. Fold the protruding flap inwards to secure the fold (5 E). Repeat the same process on the opposite, short side. If you are folding several of these bowls, you can put them together to make a set. To do this, simply fold one side of the bowl the other way round, towards the outside.
Fig. 5: Fold the paper bowl, line up the sides and fold in.
The "Jackson Cube" consists of six identical elements. For one element, place a square sheet together once with the right and left edges and once with the top and bottom edges and mark the centres of the edges with a small crease (Fig. 6 A-C). Then fold two sides in to the centre (6 D-E), leave them closed and fold the now short edges in to the centre again (6 F). Repeat this with the remaining five paper squares
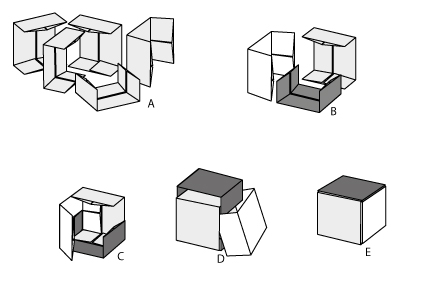
Now it gets a bit tricky, because we can now assemble the Jackson box from these six elements (Fig. 7 A). It is best to start with three elements that overlap at one corner (7 B-C). Then insert the other elements one after the other. The short sides (flaps) are covered by the long edges so that only the faces of the cube are visible on the outside (7 D-E). To prevent the elements from falling apart unintentionally, you can fix them temporarily, e.g. with paper clips. Don't forget to insert the gift before you insert the last element. The Jackson box is so sturdy that it will hold together even without glue or ribbon.
Fig. 7: Assembling the "Jackson Cube".
You can vary the size of the Jackson cube simply by changing the format of the square sheets of paper. The edge length of the cube is always half as long as the sides of the square sheet of paper. You can then pack jewellery in a smaller cube, for example. A particularly tricky version of the "Jackson Cube" is the Jackson box standing on one corner. We show you how to fold it in detail in our video tutorial.


