Leather hunting bag

This leather bag is an ideal beginner's project as it can be realised with just a few tools and a single material, Leather. Depending on your experience and skills, you will need about a day to complete it. In our video tutorial, DICTUM® course instructor Heiko Pulcher demonstrates all the steps in detail.
Table of contents - Workflow
- Making a pattern
- Leather selection
- Cutting the straps
- Drawing the parts
- Cutting to size
- Cutting leather straps
- Cleaning edges
- Sharpening
- Slotted holes for the shoulder strap
- Marking the rows of holes
- Knocking or punching holes
- Joining the parts / sewing
- Closure
- Carrying strap
Leather selection
For the hunting bag, you need a medium-strength Leather of approx. 2 to 3 mm thickness. It should have sufficient stability so that the bag does not collapse, but be soft enough to bend at the edges of the side section and on the flap. Vegetable tanned cowhide (e.g. Swedish cowhide) is ideal.
Tools
You can start the project with a simple set of tools. For some work steps, special leather tools make the work easier or enable other techniques. The different tools and solutions are explained in detail in the video tutorial.
Basic tool equipment
- Cutter, Hultafors universal knife
- Cutting ruler
- Cutting mat
- Punch set
- Dividers
- Abrasive paper sandpaper, 120 and 240 grit
- as well as a small ruler or set square, biros, lighter, Scissors and paper

Special (Leather) tools
- Crescent knife
- Leather bevelled knife
- Leather scissors
- Strap cutter
- Endless belt cutter
- Leather plane
- Punch pliers with oval hole punches
- Hole punch, 18 x 4 mm and 8 x 3 mm
Click here to download the pattern (PDF, A3 format).
Working procedure
You can add a small inner pocket to the leather bag. To do this, an additional piece of leather is sewn in when sewing the back and side panels. You can also do without the inner pocket and simply skip the corresponding work steps.
1. make the pattern
We have made a pattern for the bag, which you can download here. Print out the pattern on A3 paper and cut out the patterns. A slightly thicker paper (e.g. 200 g paper) makes it easier to trace the shapes, but normal 80 g office paper will also do.
2. leather selection
Examine the chosen leather hide for scars, holes and creases before cutting. Test the suppleness of the leather - Leather can be bent to different degrees in different directions. For the back panel with flap and the side panel, you need areas that are supple. The front, inside pocket and carrying strap can be a little firmer.
3. cutting the straps
First cut a long edge of the hide straight using the cutting ruler. Then cut one or two straps 18 mm wide along this edge. You will need a total of approx. 2 metres for the shoulder strap. The easiest way to cut the straps is with a specially designed strap cutter. However, you can also use a ruler and cutter.
4. drawing the parts
Place the pattern on the flesh side (rough inside of the skin) and trace the contours with a biro. Pay attention to the previously determined properties of the Leather (flexibility, scars, etc.). The pattern for the side wall must be folded over once or doubled. Always mark the centre lines - we will need these later to mark the rows of holes. Use a biro or pencil for marking, not a felt-tip pen! Felt-tip pens may penetrate deep into the Leather and bleed through to the outside.

5. cutting to size
Cut out all parts roughly at first. The smaller leather parts obtained in this way are easier to turn during final cutting, which is particularly advantageous for the tight radii. Use a cutting tool that you are comfortable with and can work safely with. The inner pocket should be cut approx. 1 mm smaller all round than marked on the pattern so that it fits inside the bag. A cutter knife is a good basic tool. Professionals use a half-moon knife for cutting.
6. cut leather straps
All parts of the bag are connected to each other with leather straps only (no Adhesives, no rivets). You can easily make these leather straps yourself using a so-called endless strap cutter. The great thing about this is that you can use small pieces of waste that would normally end up in the bin. To insert the endless strap cutter, cut a round hole in the centre of the piece of leather. Then cut a strip approx. 4 mm wide along the inside edge of the hole as a start. Thread this beginning into the endless belt cutter, which is sometimes a little awkward. Now all you need to do is pull the beginning. The leather straps cut themselves almost automatically.

7. polishing the edges
In classic fettling, all leather edges are carefully sanded, coloured, hardened with wax or Shellac and polished. We only do a simplified buffing on our leather bag and sand all visible edges slightly round with Abrasive paper sandpaper (first 120 grit, then 240 grit). Only sand the edges, not the flats. Loose fibres are flamed off with a flame (lighter or candle) at the end.
8. sharpening
All areas that are to be bent later on are slightly sharpened, i.e. they are thinned out. To do this, we sand the transition between the back panel and the flap a little thinner with coarse sandpaper (120 grit) and then smooth it with finer sandpaper (240 grit). The edges of the side panel must be able to bend inwards when joining and also be easily gathered. To do this, starting from a width of 12 mm, they are sharpened to a thickness of approx. 1 mm towards the edge. Traditionally, a half-moon knife or a bevelled knife is also used for sharpening. It is somewhat easier and safer to use a so-called leather plane or, if necessary, Abrasive paper sandpaper.
When sharpening, place the Leather with the flesh side up on a firm base (marble slab), not on the cutting mat - this will be damaged when sharpening with the crescent or bevelled edge knife. Always work from the inside out and take care not to sharpen too thinly or cut through to the visible side.

9. slotted holes for the shoulder strap
Before sewing together, all the holes must be punched or punched into the parts. This also includes the eight openings in the side section through which the carrying strap is pulled. The positions of the slotted holes are first marked on the side section. If you do not have a special cross-cut punch (which can be used to punch slotted holes in a single operation), proceed as follows: First punch two holes with a punching iron (Diameter 3 mm) at the distance of the belt width (18 mm) and then connect the holes with two straight cuts with the cutter knife to form a slotted hole.
10. marking the rows of holes
On the side panel, the centre line of the holes for sewing is 8 mm from the edge. The distance is only 7 mm on the back and front, and only 6 mm on the inside pocket. Mark or score these distances with the compass on the flesh side. Now set the compass to the hole spacing of 18 mm. Starting at a distance of 9 mm from the centre marking, pierce the markings for the holes along the spacing line so that they are visible on the visible side.
11. punching or punching holes
The holes for sewing are all punched from the visible side (smooth front/hair side) with a punching iron or punched with a hole punch. Test in advance which hole diameter is suitable for your leather straps. The straps must be able to be pulled through with moderate force when sewing, but should not slip through when pulled sideways. For the example bag, hole punch pliers with oval pipes were used, which are ideal for the cut leather straps (3 x 5 mm).

12. joining the parts / sewing
Now we can join all the parts together. We start by joining the back panel, side panel and inner pocket, as this seam is slightly more difficult (3 parts) than joining the front panel to the side (only 2 parts). First place the side panel on the inside of the back panel. At the first hole, the tape comes from the inside to the outside and goes back to the inside at the second hole. The inside pocket is now added at the third hole. The tape again goes from the inside through the inner pocket, then through the side and through the back panel to the outside. Started in this way, the Others "stitches" will come naturally. When sewing, make sure that the ribbon is always on the outside with the nice smooth hair side facing up. Initially, only pull the ribbons loosely through the parts. Once all the holes have been filled, you can tighten the seam properly (not so tight that the leather strap tears, of course!).

To secure the seam, pull the respective end under the tape at the penultimate hole and then push it through the resulting loop.
13 Closure
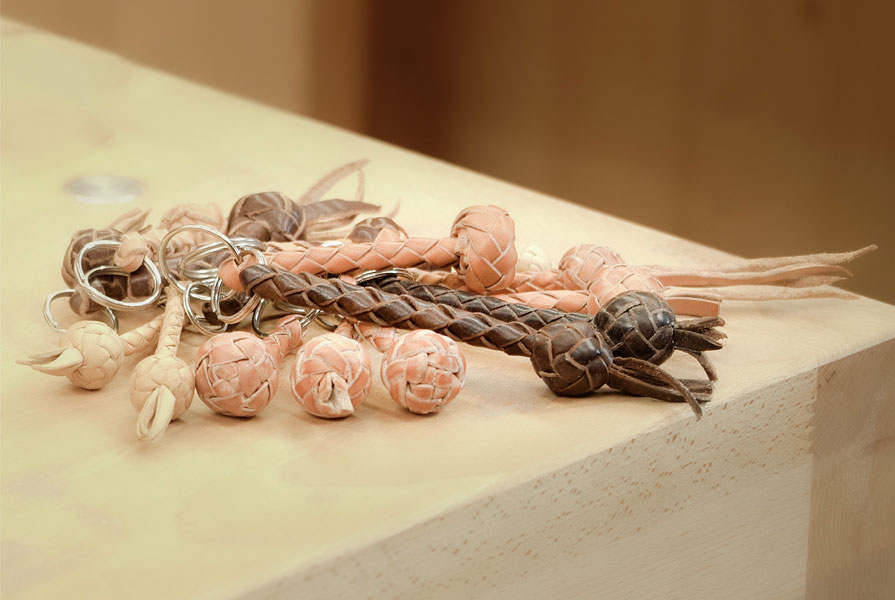
You can give free rein to your creativity when it comes to the Closure. In the video tutorial, we have presented three options for a bag fastening without a clasp or buckle. You can find the patterns for the wrapped leather button and the push-through strap in the template. You can also make a simple button yourself from antlers or wood and then close the bag with a loop as with the leather button.

14. carrying strap
Finally, the carrying strap is pulled in. To be able to adjust the Length of the strap, we have punched five holes at the ends at the same distance as the strap width and connected four holes with a leather strap. This "seam" is also secured by inserting one end under the strap at the previous hole.
Care of the bag
Leather is a natural product and requires some care. Treat your bag to some leather balm from time to time to make the Leather more supple and protect it from moisture. The leather balm penetrates deep into the rough edges and makes them slightly darker, giving the hunting bag a rustic look.

Tip: Hardness Leather
Leather that is soaked in water and then dried quickly becomes stiffer. This effect can be enhanced by adding soda to the water. For example, you can give the coiled leather button more firmness.