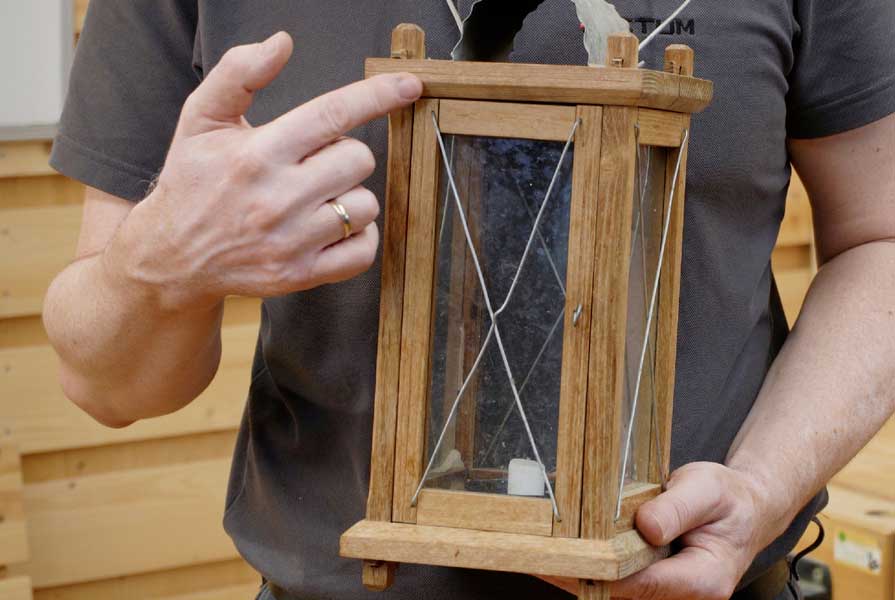
Build invisible wooden hinges yourself
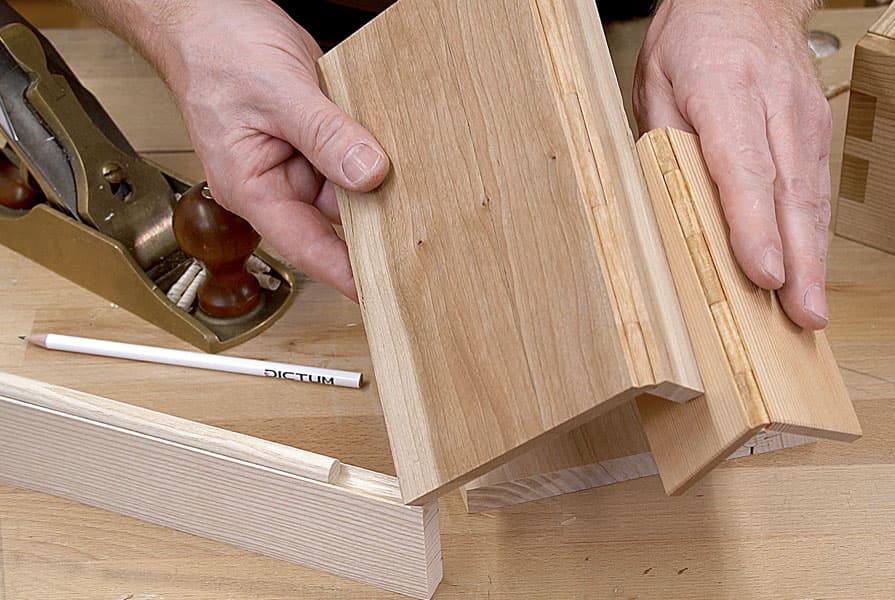
Whilst searching the internet for ways to make wooden hinges, we came across a method by Rob Cosman that can be used to make almost invisible wooden hinges. However, Rob Cosman uses special tools to drill the axles. We show you how to make the hinges using conventional tools.
How do wooden hinges work?
The principle of these hinges is based on sections of round timber, which are pivoted against each other using small brass rods. The pieces of round timber are glued alternately in grooves to the two parts that the hinge connects. The groove is positioned so that the round bars protrude to a certain extent. If the round bar is made from the same material as the piece of furniture and this overhang is planed off at the end, the hinge is almost invisible. The best results are achieved if the material for the round rod is cut out of the wood at the point where the round rod is later glued back in.
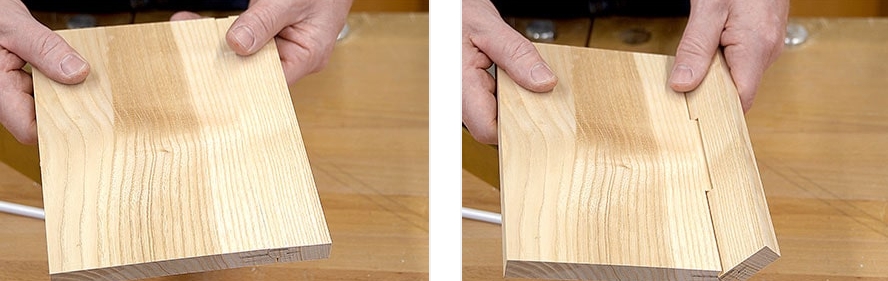
The trick is to ensure that the grain later appears continuous by cutting the material in a planned manner. The parts that are connected to the hinge and the blank for the round bar should be cut from one piece if possible. Cut the parts in the order in which they will later be used on the workpiece. In the case of a casket, for example: lid, hinge (round rod) and side. Mark the parts on the front edge with a continuous line so that you can align them correctly later.
The hinge rollers are cut from the same piece as the sides.
Production of the round bar
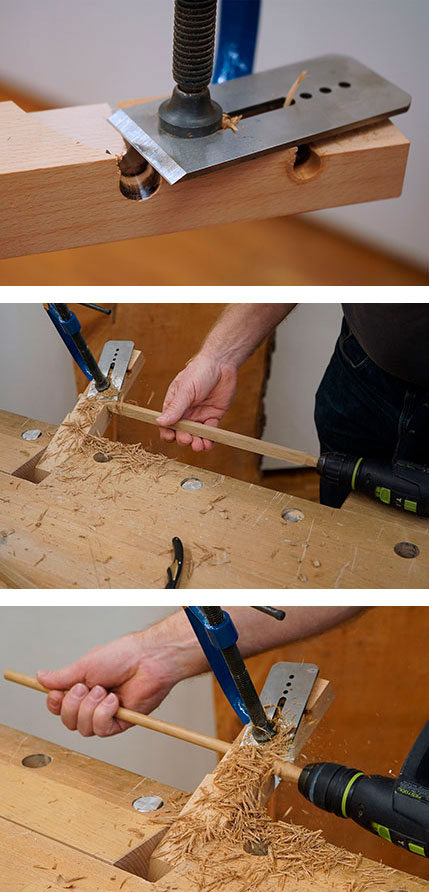
There are different methods for producing round bars. There are various dowel cutters with more or less precisely preset diameters and roundwood cutters where the diameter can be precisely set. The quality of the cut surface varies between the methods. Round bars can also be milled using a router, with different results in terms of dimensional accuracy and surface quality depending on the procedure. In our case, the best result was achieved with the round bar cutter from Veritas. We also achieved very good results with the help of a self-made device.
A plane iron serves as the cutting edge for this self-made dowel cutter.
After making the round bar, place it between the other parts and align it as it was originally orientated. Use a pencil to draw a line along the entire length so that you can align the parts precisely again after cutting to length.
Cutting to length and drilling the hinges
Divide the round bar into an odd number of sections and mark their lengths. Also mark the individual lines at the joints with I-I, II-II etc. so that the sequence and alignment are not reversed after sawing. The hinge parts can be cut to length precisely and without tear-outs in a saw frame with grooves. If you want to improve the quality of the cut so that the parting lines between the hinge parts are even finer and therefore less visible, you can also butt the parts at the end faces. To do this, however, the stop of the butt joint tray must also have a groove. The moulding of the saw blade and the stop of the butt joint is done using the same method that we use for the moulding of the side parts.
The next challenge is drilling the centre of the hinge parts. This can only be done really accurately with a pillar drill. In order to hold the parts exactly at right angles to the drilling table and to hit the centre of the round bar precisely, we make a drilling jig from two wooden blocks. We drill a hole with the diameter of the round bar into a slightly thicker block that can hold about half of the hinge parts. This block is used to hold the hinge parts upright during drilling. In order to hit the centre exactly on the front side, drill a hole approx. 3-4 mm deep into a 10 to 12 mm thick block with a wood drill with a centre point in the diameter of the round bar. Using a drill bit with the diameter of the axle material (in our case a 3 mm brass round bar), you can then drill a hole through the centre of the block.
With the help of two self-made blocks, the axles are drilled in the centre.
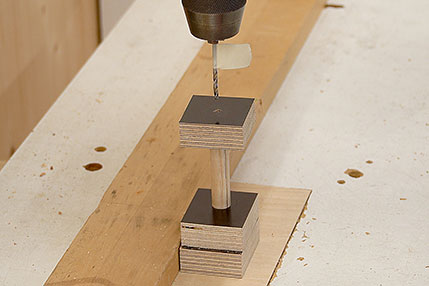
This block is placed on the end to be drilled and the axle hole is drilled exactly in the centre using the centre hole. If you often build hinges of this type, you should always replace the centring block when the centre hole is worn. The depth of the centre holes depends on how long you make the centre pieces. The axle pieces should be halfway into each of the two hinge pieces. As already mentioned, we made the axles from a 3 mm round brass rod and cut approx. 10 mm long pieces from the brass rod to length and deburred them cleanly. Now you can plug the individual parts together with the axles in the correct orientation.
Fillets in the side panels
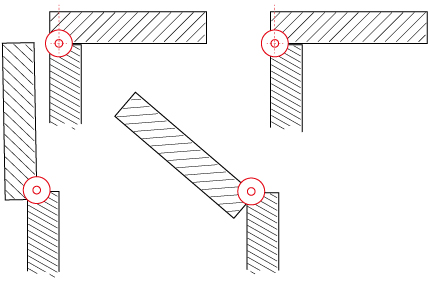
The fillets in the sides can either be made using a combination plane with a matching moulder or on a router table with a matching moulder cutter. In the video, we modified a moulding plane so that we were able to install a moulder from the combination plane. The moulding plane should have an adjustable depth and rip fence so that you can set the exact position of the moulding. The two fillets in the parts must be deep enough to leave a minimal gap between the side parts, otherwise the hinge and the lid will "jam" or the door will not close completely. In addition, the grooves must be arranged so that the round bar protrudes slightly on the outside. The further the round bar protrudes, the further the hinge can be opened. You should determine the exact position by carrying out your own tests.
The more the round bar protrudes, the wider the lid can be opened.
Gluing the hinge
The sections of the round bar are now glued alternately to both side parts. Mark the position of the separating joints on the sides. Also mark where to glue and where not to glue. To ensure that the sections that are not to be glued are not glued due to glue oozing out, you should coat these areas in the grooves with soft wax, e.g. DICTUM wood balsam, as a release agent. The glued surfaces of the fillets can now be coated sparingly with glue and the parts clamped together. Ensure that the longitudinal marking on the hinge roller is aligned and that the separating joints are tight.
Plastering the roller protrusion flush
Once the glue has hardened, you can plaster the overhang of the hinge flush with the plaster plane. If all the joints were flush when gluing, the hinge will be almost invisible when closed. We provide further tips on the dimensional accuracy and fit of the round bar and fillet and on the quality of the surfaces of the round bar in our video instructions. In it, we also show you how to mill the fillet on a milling table.