
10 tips for screwing with wood screws
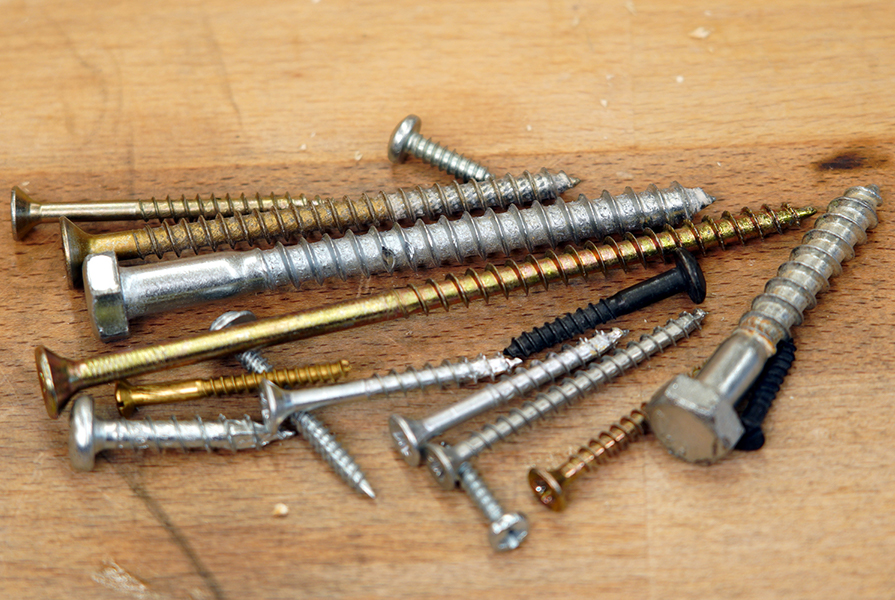
Screws are a practical solution for quickly and easily connecting furniture parts, assembling wooden structures and fastening wall panels or decking boards. However, things can quickly go wrong when working with wood screws. The wood splinters, the screw turns and does not hold properly or the screw head is damaged. In this article, you will learn how to choose the right screws for your project and how to use wood screws correctly.
Advantages of screws:
- Easy to use. Joining two pieces of wood with screws is very simple and does not require a great deal of skill. No training is required to screw a board to a beam.
- Fast processing and direct hold. In contrast to wood glue, which always requires a certain amount of time to harden, screwed joints are immediately fixed and can be loaded.
- Detachable connection. As long as the screw head has not been damaged, screwed connections are very easy to undo. This is virtually impossible with glued joints or fasteners such as plugs and flat dowels.
- Assembly in situ. Larger pieces of furniture or wooden constructions can only be assembled on site. By then, they have been dismantled into individual parts or assemblies and are easy to transport. Assembly on site is usually possible without any problems using screws.
- Attaching metal parts. Metal or plastic fittings, hinges and connectors can be firmly and stably attached to wooden parts using screws.
- Observe the fibre direction of the wooden parts
- Consider the shrinkage behaviour of wood
- Use screws suitable for the construction
- The right screw length
- Always pre-drill wood screws!
- Always countersink countersunk and pan-head screws
- Use suitable screwing tools
- The right torque
- Screw in slotted screws by hand
- Replace defective screws immediately
Observe the fibre direction of the wooden parts
Wood screws that are screwed in at right angles to the wood fibres (tangentially or radially to the annual rings) hold better than screws that sit in the direction of the longitudinal fibres (in the end grain). If the position of the parts does not permit screwing across the grain, you should use screws that are as long as possible. However, it is more stable and often easier to realise if additional connecting elements are planned (e.g. wooden strips as supports or metal brackets).
Consider the shrinkage behaviour of wood
Wood works and changes its dimensions depending on the humidity. If wider wooden surfaces are firmly connected to a structure, the wood cannot shrink or swell and visible cracks will form after some time. Traditionally, solid wood table tops and seats of wooden chairs are therefore not screwed firmly to the frame, but are connected to it using grooved blocks or burr mouldings. For screwed connections, you can drill slightly larger holes or slotted holes so that the screws can move with the wood.
Use screws suitable for the construction
There are suitable wood screws and fasteners for almost every task and requirement. It is almost impossible to cover them all in one blog post. Please find out about the wide range of options in the shops. Here are just three examples:
Use wood screws with a shank, so-called partially threaded screws, to connect furniture parts that are light and only subject to low loads. The shank pulls the components tightly together. Screws with a continuous thread offer more hold, but the wooden parts push apart when screwed together and a visible gap often remains.
Strong wood screws with a large hexagonal head (so-called spanner screws) with additional washers are suitable for connecting two beams in timber construction or interior fittings. These screws can be tightened very firmly using open-end spanners or ratchets. The flat screw head and the washer distribute the resulting forces over a larger area.
Substructures and simple battens are quickly installed using self-tapping screws and so-called universal screws with a drill point. However, they are only suitable for simple work where beauty or clean workmanship is not important.
The right screw length
Select the length of the screws according to the load on the components. In furniture construction, this should be at least twice the material thickness of the part to be fastened (e.g. 19 mm material thickness = 40 mm screw). For more heavily loaded components and load-bearing structures, the screw length should be at least three times the material thickness.
Always pre-drill wood screws!
Unless you are using self-drilling screws, you should generally pre-drill wood screws. Otherwise there is a risk of the wood splitting lengthways or pieces splintering off.
What diameter should wood screws be pre-drilled with?
In order for the thread to grip and the screw to find an optimum hold, the "core diameter" is used for pre-drilling. The core diameter is the smallest diameter on the thread or the diameter of the inner cylinder between the thread. If no shaft screws are installed, you should pre-drill the part that is to be screwed on in the "nominal diameter". The nominal diameter is the largest diameter of the screw thread and is usually given as the first number of the screw size (e.g. 3.5 x 40).
If the screw is not pre-drilled, the wood will splinter!
Always countersink countersunk and pan-head screws
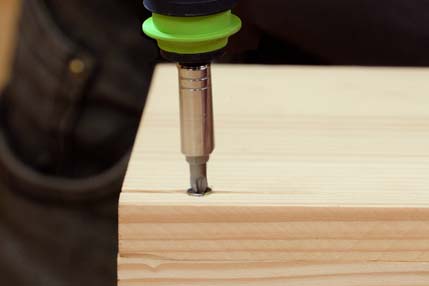
If the wood screws used have countersunk or raised countersunk heads, you should also countersink the holes. This is done with a countersink 707374 or a countersink 707592.Countersinks with depth stop 729265 are particularly practical, as the drilling depth and the depth of the countersink can be set to match the screw. If the hole is not countersunk, the conical screw head pushes the wood fibres apart and the wood can split despite pre-drilling.
Use suitable screwing tools
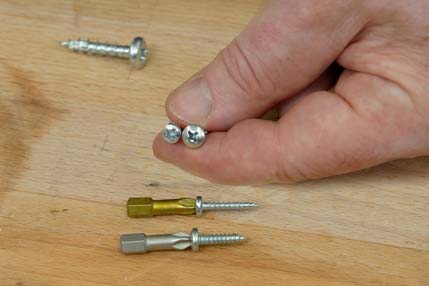
To ensure that the screw head is not damaged when screwing in or unscrewing the screw, a screwdriving tool with a suitable blade or bit must be used. If the shape and size do not match the screw head or slot (experts refer to this as "screw drive"), the tool will slip and, in the worst case scenario, the screw will become unusable or can no longer be screwed in or unscrewed. In our blog post Don't spin! (link to blog) you can find out more about the different screw drives and bit shapes. Pay attention to quality when selecting screwdrivers and bits. Cheap bits are often of inferior steel quality. They are too soft, deform or do not fit perfectly into the screw heads.
Similar but not the same: Phillips and Pozidriv head screws
The right torque
Tighten wood screws with the correct force or torque. To do this, switch the cordless screwdriver from "drilling" to "screwing" and select a slow speed setting. As wood is not a homogeneous material and the force required can change during screwing, select a comparatively high torque if the cordless screwdriver offers this option. The low speed allows you to control the screwing in of the screw and stop it in good time. A lower torque is only selected when installing sensitive materials (e.g. plasterboard) or when working with very soft woods (e.g. spruce).
Screw in slotted screws by hand
Slotted screws are usually only used for decorative purposes or for attaching fittings. To achieve a harmonious overall appearance, the slots of the screws should all point in the same direction (e.g. diagonally or lengthways). To do this, the screws are aligned by hand using a screwdriver. In addition, with cordless screwdrivers there is always the risk of the bit slipping out of the single screw slot and damaging the workpiece.
Always screw in soft brass screws by hand
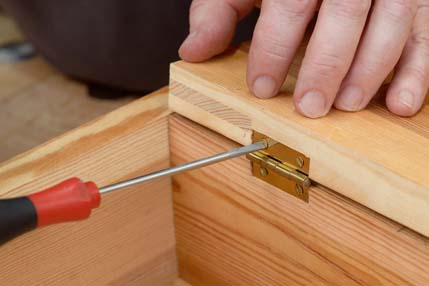
Some screws are only available with a single slot, and small brass screws in particular are usually only available as slotted screws. The reason for this is that brass is a very soft screw material. If a brass screw is overtightened, the screw head will unscrew. To prevent this, brass screws are not usually available with a cross recess or even Torx, as these enable a high level of force transmission.
Replace defective screws directly
If something does go wrong and the screw head is damaged, unscrew the screw straight away and replace it with a new wood screw with an intact screw head. Hardly anything is as annoying as trying to remove an old screw with a defective head. If the screw is not yet completely screwed in, you can also use combination pliers to unscrew it. Defective screws that are still screwed in or remain in the wood will seize over time, they can rust or stick to the wood due to the surface treatment.


