Making a wooden plane is not that difficult. We provide tips to help you succeed. We will tell you which tools and materials you need and explain each work step in detail.
We largely followed the method David Fink described in his book Making and Mastering Wooden Planes. For those who want to delve deeper into the subject of plane making, this book is highly recom-mended. In our video, Peter Lanz shows you how to build a wooden plane in practice.
Which tools do I need to make a plane?
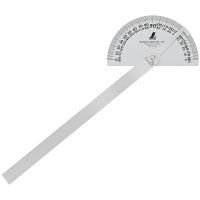
- Scribing tools: Combination square, protractor, marking knife and pencil
- Saw for ripping
(preferably a circular or bandsaw, but can also be done with a hand saw) - Drill with 6 mm bit
- Saw for cutting the centre block
(Circular saw with mitre gauge, can also be done by hand) - Block plane
- Chisel
- possibly router with groove cutter (Ø 18 mm)
- Hammer
- Glue, clamps and cauls
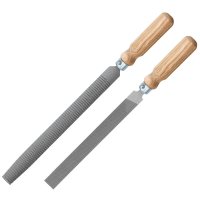
- Rasp
- Spokeshave
- Sandpaper
Which material is needed to make a plane?
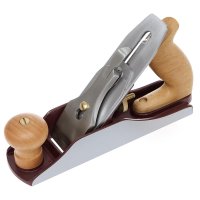
You can actually use all hardwoods for the plane body. In the past, red beech was usually used for this purpose. However, since beech wood especially is subject to swelling and shrinking, the plane body was usually glued together from several pieces. You can also use oak, maple, ash, pear or wild service tree wood. The fine-pored woods have slightly better gliding properties than the open-pored ones. To protect the plane sole against wear, particularly hard wood such as hornbeam or even roughbark lignum vitae wood was used as a glued-on plane sole. In our example, we use an oak plane body with a glued-on hornbeam sole.
The wood fibres should run as straight as possible through the plane body. If the grain is slightly diagonal, it should run diagonally backwards out of the plane sole, so that when you use the plane, you are working with the grain. The orientation of the annual rings, standing, lying or diagonal, does not play a significant role. If the annual rings are lying, the side facing away from the core should be down.
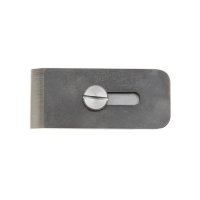
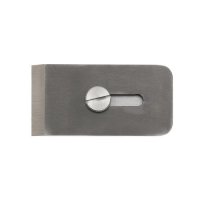
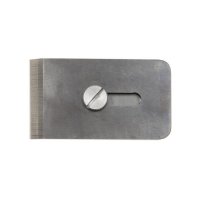
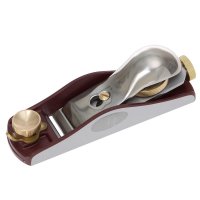
For the plane blade, you can use a used one from an old plane. However, there are also very good new plane blades that are available especially for DIY planes. We use Ron Hock blades, which are available in widths of 38, 45 and 51 mm. These blades are ideal for Krenov-style planes. They are not as long as normal bench plane blades, and they are significantly thicker, which makes for smoother planing. They also have a perfectly fitted cap iron (chip breaker), which is also much thicker than other plane blades.
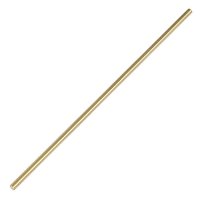
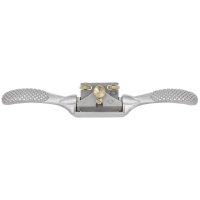
For the abutment you need a square bar, 12 by 12 mm, with as straight a grain as possible and a brass round bar with a diameter of 6 mm. As an assembly aid, you will also need a few wooden dowels, preferably not grooved and likewise 6 mm thick.
The dimensions of the plane body blank are chosen according to the intended use. The width of the plane blade used is decisive for this. Since the plane body is first split into a centre part and the two cheeks, the saw kerfs and the material lost by smoothing them must also be taken into ac-count. To ensure that the plane can be adjusted precisely, the centre part must always be slightly wider than the plane blade.For a block plane (blade width 38 mm), the dimensions for the blank are as follows:
Width: 2x cheeks 8 mm + 2x saw kerf 2 mm + centre part 41 mm = 61 mm
Height: 55 mm
Lenght: 180 mm
For a smoothing plane (blade width 51 mm):
Width: 2x cheeks 10 mm + 2x saw kerf 2 mm + centre part 54 mm = 78 mm
Height: 60 mm
Lenght 240 mm
For a jack plane (blade width 45 mm):
Width: 2x cheeks 10 mm + 2x saw kerf 2 mm + centre part 48 mm = 72 mm
Height: 60 mm
Lenght: 330 mm
The dimensions given are to be seen as an example and guide and can be changed according to your own wishes.
How is a wooden plane made?
- Marking the grain pattern, triangle. So that nothing is confused later, mark the grain pattern on the sides of the cheeks and a triangle on the top with the tip pointing in the direction of use.
- Ripping the blank. The blank should be perfectly planed at an angle in cross-section. Cut enough off from each side of the cheeks so that the remaining centre section is still at least 1 to 1.5 mm wider than the plane blade after smoothing. The cut surfaces (inner sides) of the two cheeks are also planed. Ripping and joining can be done with hand tools. It is easier and more precise, however, with a circular or bandsaw and a thicknessing planer.

The plane body is glued together from three parts
- Drill in dowels. So that the cheeks can be glued back onto the centre section with an exact fit later, first drill holes for dowels in the upper corners, which will be omitted when shaping later. The dowels used for this purpose should preferably not be grooved and should fit tightly. Fit them exactly flush with the surface of the cheeks in order to avoid cancelling out the clamps’ pressure during glueing.
- Mark out the opening in the plane body and saw it out. Chisel the block of cheeks and centre section apart again. Put the two cheeks aside for the time being so that they are not accidental-ly sawn with the centre part. On the centre part we now scribe the cut-out for the plane blade and the mouth opening. The bedding angle of the blade is 45°. The plane mouth should be at about 5/9 measured from the back. The point where the cutting edge meets the plane sole is determined by placing the plane blade against the mitre square.

Dimensions for the opening in the plane body and the position of the abutment
Draw a 3 to 5 mm line from this point, perpendicular from the plane sole upwards. This is where the front edge of the mouth will be. It is only from here that the angle for the mouth opening is scribed at 62°. Now the centre part of the plane body is sawn apart. You can use hand tools for this purpose, it is, however, much easier and more accurate to do this with a circular saw with a mitre gauge. You should not cut the straight edge on the plane mouth exactly yet. It is precisely adjusted af-ter glueing. Do not throw away the leftover piece when sawing the centre block, it will be used later to make the wedge!
- Drill hole for abutment. The centre of the drill hole in the plane body is 30 mm from the bot-tom edge (plane sole). For exact positioning, the rear part of the body and cheek are put to-gether. With the help of the plane blade and the chip breaker, the position of the abutment can now be precisely measured and scribed. The gap between the chip breaker and the abut-ment should be 5 mm. This is where the wedge will be inserted later. Now drill one cheek, preferably on a box column drill with a 6 mm drill bit. Then put the second cheek on and drill through the hole you just drilled into the second cheek from the other side.

The parts of the plane body are put together for drilling the abutment
- Make the abutment. The abutment consists of a brass axle put through a wooden block, which serves to better distribute the pressure. The length of the wooden block should be shorter than the width of the centre part. The different shrinkage behaviour of the abutment and plane bodycould otherwise cause the abutment to burst the plane body. To centre drill the abutment, draw diagonals on both ends and drill from both sides towards the centre. To en-sure that the hole runs as straight as possible through the block, you can prepare a batten with a cut into which the block can be put. The axle should be slightly shorter than the total width of the plane body so that it does not protrude later when smoothing the outer sides. Slightly chamfer the ends. The wooden block is rounded at the top.
- Cut-out for the cap iron screw. Before the plane can be glued, we need a cut-out for the head of the cap iron screw. If you have a router with a suitable bit and two rip fences, this can be done very quickly and easily. Alternatively, make a template for the thrust ring or chisel out the recess by hand. The recess should be large enough for the plane blade to slide forward to the plane sole, and also have enough play at the sides for adjusting.
- Glueing. So that you do not forget the abutment in the next step, it is best to put it in one of the two cheeks first of all. In order to align the front and rear parts quickly and accurately, clamp a caul to the underside of one of the two centre blocks. Now apply glue and stick on the corresponding cheek. Then put glue on the second block and stick that on the cheek as well. By working with a second clamp, you can now align the two parts exactly with the help of the caul. Then apply glue to the second cheek and put it in place. Use a sufficient number of clamps. Remove escaping glue directly.
- Making the wedge. The left-over piece of the centre block is large enough to make the wedge. Scribe the thickness and bevel of the wedge. You can come up with a beautiful design for the top edge. We have gone for a rounded thickening. This shape mimics a wood shaving. Cut with a bandsaw, the cut surfaces smoothed and the width slightly reduced with a plane, the wedge is quickly prepared for later fitting.
- Adjust the wedge and plane mouth. Once the glue on the plane body has hardened, you can insert the blade and wedge for the first time. If the wedge jams on one side, adjust it so that it jams equally across the entire width of the abutment. If the cheeks of the plane body are too high to adjust the blade and wedge, first roughly cut them back. Now you can adjust the front edge of the plane mouth. To do this, file it away so that the mouth opening is small and parallel to the cutting edge.
Caution: Do not hit the blade through the plane mouth too early, this can cause chipping on the underside. The plane mouth edge should remain as sharp as possible! - Planing the plane sole. Use sandpaper to smooth the sole on a flat surface (e.g. on a machine table). Now, you can use the plane to remove the first chips – provided the blade is sharp.
- Shaping and finishing. Draw the desired silhouette on one side of the plane body and saw out the shape with a bandsaw. If you don't have a bandsaw, you can also use rasps. Make sure, however, that the rasping strokes are made perpendicular to the sides of the plane body. The edges are only rounded after lines for facets have been drawn. The intermediate work step of starting with facets makes it easier for both sides to become symmetrical and the curves har-monious. The side edges of the plane sole can be slightly chamfered before the surface is sanded.

With spokeshaves, rasps and files, the plane body gets into shape
- Surface finishing. Finally, you can oil the plane (e.g. with ASUSO NL Hard Oil or treat it with two to three coats of Shellac. The plane sole remains untreated. In order to make the plane glide better, you can polish the sole with Paraffin Wax and shavings.