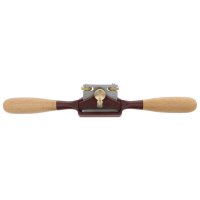
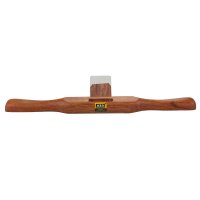
To smooth curved edges, create fine transitions between straight and rounded edges or to provide rounded edges with a bevel, the spokeshave can hardly be surpassed by other tools. Spokeshaves come in a variety of shapes. In this article, we will take a closer look at the most popular models made of metal with straight and rounded plane soles.
Application
These planes are made for processing curved workpieces. Strictly speaking, they are normal planes, but because of their very short shooting board and side-mounted handles, they can follow curves very well. Spokeshaves are also ideally suited for applying a bevel of varying width to curved edges. Basically, spokeshaves are made for the same applications as simple drawknives. Especially wooden spokeshaves are not much more than a drawknife with chip thickness limitation and are guided similarly. However, the surfaces or edges are usually smaller and the desired result finer.
Shaping of the shooting board
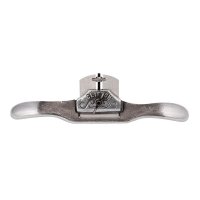
Somewhat simplified, it can be said that spokeshaves with a straight shooting board are intended for convex shapes and those with a rounded one for concave shapes. However, a spokeshave with a rounded shooting board is also suitable for external curves. However, handling is then somewhat more difficult. And a spokeshave with a straight shooting board can also be used for inner curves if they have a slightly flatter radius.
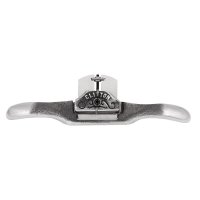
Most spokeshaves with a rounded shooting board have a small straight surface in the area of the plane blade. Only a few are completely rounded, and even on these planes the rounding is much flatter in the middle. This small surface makes it easier to work convex shapes (outer curves) with a spokeshave with a rounded shooting board.

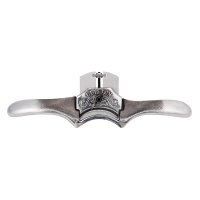
Three different shooting boards: straight, rounded and concave
The size of the mouth piece also has an effect on handling. The smaller the mouth piece, the easier it is to use and the cleaner the surface. However, a plane with a small mouth piece allows only little material removal and correspondingly thin chips.
How to use spokeshaves?
Before edge processing or after sharpening, the first thing to do is to adjust the chip thickness. For spokeshaves with adjusting screws, the adjustment is self-explanatory. It is important to loosen the clamp of the iron slightly and then tighten it again. After adjusting the iron, the adjusting screws should be turned forward until they are in contact with the plane blade so that the blade does not move unintentionally.
Planes without adjusting screws are placed on a clean wood surface and the plane body is pressed on firmly so that the lateral and rear edges of the mouth piece rests on the wood surface or a straight plane base rests fully on the wood. Then insert the plane blade into the plane body and bring the cutting edge in contact with the wood surface and clamp the blade firmly. If the chip is too thin, drive the iron out of the plane by lightly hitting the rear edge with a plane hammer. If the chip is too thick, loosen the iron again, pull it back and start the adjustment from the beginning.
Tip: Some craftsmen do not set the iron parallel to the plane base, but at a slight angle, so that chips of different thicknesses can be removed across the width of the shooting board. This makes it much easier to work on concave-convex curved edges, as the chip thickness does not have to be constantly readjusted.
Do spokeshaves work by pushing or pulling?
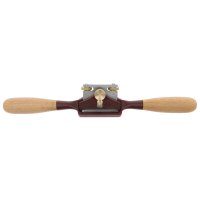
Spokeshaves can be used for both on pull and on push. Since the spokeshave, like all planes, must always be planed with the grain pattern, it can be difficult to work at the point of the rounding where the grain pattern changes. Here, the planing direction must be changed back and forth frequently. Then it is easier to turn the planer than to turn the workpiece over every time or to stand on the other side of the workpiece.

A spokeshave can be used by pulling or pushing, depending on the grain pattern

How can chatter marks be avoided?
If the spokeshave leaves chatter marks when planing, this can have various causes. The chatter marks occur because the cutting edge gets caught in the cut and the cutting edge immediately comes loose again, and this is repeated in rapid succession. This happens either due to vibrations of the workpiece, which should then be clamped more firmly, or due to vibrations of the plane blade, which is too thin or does not lie properly on the plane body or in the iron bed. Planes with a very large mouth pieces and thick shavings also run a high risk of creating chatter marks. To eliminate chatter marks, you should first try to eliminate the cause. Then change the orientation of the plane to the chatter marks by guiding it at an angle to their course. If you continue to hold the plane parallel to the chatter marks, they will tend to get worse.
How can I optimize my spokeshave?
Round off sharp edges. Some planes with straight bases have very sharp leading and trailing edges that cut into the surface when planing slightly concave curves. You can round off the sharp edges of these planes with a file and then smooth them with fine sandpaper.
Polish the plane base. It also happens that the surface of the plane base is only very roughly ground. These planes glide more easily if you repolish the plane base with 320, 400 and 600 grit sandpaper.
Adjust the size of the mouth piece. The size of the mouth piece cannot be adjusted directly. If the mouth piece of a plane is too large, you can “reduce” it by fitting a shim under the plane blade. However, this requires metal (sheet metal) shims. Wood or plastic would be too soft, and the plane would tend to chatter even more. The shims cut from sheet metal should, if possible, cover the entire contact surface of the iron so that the iron rests properly and does not wobble. If the mouth piece is too narrow and chips are constantly caught in it, you can carefully open it up a little with a fine file.