While searching for ways to make wooden hinges, we came across a method by Rob Cosman on the internet that makes it possible to build almost invisible wooden hinges. However, Rob Cosman uses special tools to drill in the axles. We show you how to make the hinges with conventional tools.
How do wooden hinges work?
The principle of these hinges is based on sections of round wood that are pivoted against each other with small brass rods. The pieces of round wood are glued alternately in fillets to the two pieces that the hinge connects. The fillet is placed in such a way that the wooden dowels protrude to a certain extent. If the wooden dowel is made of the same material as the piece of furniture and this protrusion is planed off at the end, the hinge is almost invisible. The best results are achieved if the material for the wooden dowel is cut out of the wood at the point where the wooden dowel will later be glued back in.


The rollers of the hinge are cut from the same piece as the sides.
The trick is to make sure that the grain appears continuous later on by cutting the material open in a controlled way. The parts that will be connected to the hinge and the blank for the wooden dowel should be cut from one piece. Separate the parts in the order in which they will later be fitted to the workpiece. For a casket, for example: lid, hinge (wooden dowel) and side. Mark the parts on the front edge with a continuous line so that they can be correctly aligned later.
Making the wooden dowel
There are different methods for making wooden dowels. There are various dowel cutters with more or less precisely preset diameters, and dowel rod cutters where the diameter can be set precisely. The quality of the cut surface varies between the methods. Round bars can also be milled with the help of a router, with different results in terms of dimensional accuracy and surface quality, depending on the procedure. The best result for us was achieved with the dowel rod cutter from Veritas. We have also achieved very good results with the help of a home-made device.


A plane blade serves as the cutting edge for this homemade dowel cutter.
After making the wooden dowel, place it between the other parts and align it as it was originally oriented. Use a pencil to draw a line along the entire length so that you can accurately align the parts again after cutting them to length.
Cutting to length and drilling the hinges
Divide the wooden dowel into an odd number of sections and mark their lengths. Also mark the single line at the joints with I-I, II-II etc. so that the order and alignment is not reversed after sawing. The hinge parts can be cut to length exactly and without tear-out in a saw board with fillet. If you want to improve the quality of the cut so that the parting lines between the hinge parts are even finer and therefore less visible, you can still trim the parts at the end faces. To do this, however, the fence of the shooting board must also have a fillet. The filleting of the saw board and the fence of the shooting board is done with the same method that we use for the filleting of the side parts.
The next challenge is the central drilling of the hinge parts. This can only be done really accurately with a column drill press. To keep the parts exactly at right angles to the drilling table and to hit the centre of the round bar, we make a drilling jig out of two wooden blocks. We drill a hole with the diameter of the round bar into a slightly thicker block that can hold about half of the hinge parts. This block serves to hold the hinge parts upright while drilling. In order to hit the exact centre on the front side, drill a hole about 3-4 mm deep in a 10 to 12 mm thick block with a wooden drill bit with a centre point in the diameter of the round bar. With a drill in the diameter of the axle material (in our case a 3 mm brass round bar) you can then drill a hole through the block centrically.

The axles are drilled centrally with the help of two self-made blocks.
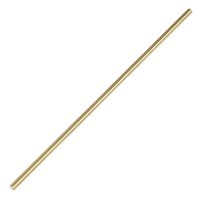
This block is placed on the to be drilled end and the axle hole is drilled exactly in the centre with the help of the centre hole. If you often make hinges of this kind, you should always replace the centring block when the centre hole is worn out. The depth of the axle holes depends on how long you make the axle pieces. The axle pieces should be halfway in each of the two hinge pieces. As already mentioned, we made the axles from a 3 mm round brass rod. To do this, we cut approx. 10 mm long pieces from the brass dowel and deburred them cleanly. Now you can put the individual parts with the axles together in the correct orientation.
Coving of the side panels
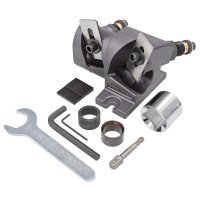
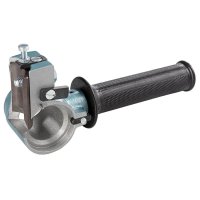
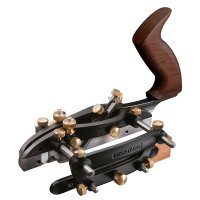
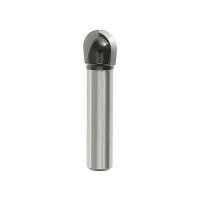
The coves in the sides can either be made with a combination plane with a matching coving tool or on the router table with a core box bit. In the video, we modified plow plane so that we could fit a fluting blade from the combination plane. The fillet plane should have an adjustable depth and rip fence so that you can adjust the exact position of the cove. The two coves in the pieces must be deep enough to leave a minimal gap between the side pieces, otherwise the hinge and the lid will “jam” or the door will not close completely. In addition, the coves must be arranged so that the wooden dowel protrudes slightly on the outside. The further the wooden dowel protrudes, the further the hinge can be opened. You should determine the exact position by your own tests.

The more the wooden dowel protrudes, the further the lid can be opened.
Gluing the hinge
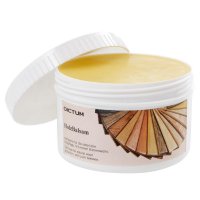
Now glue the sections of the wooden dowel alternately to both side pieces. Mark the position of the joints on the sides. Also mark where to glue and where not to glue. To prevent the sections that are not to be glued from being glued due to the glue oozing out, you should coat these surfaces in the coves with soft wax, e.g., DICTUM wax for preserving wood, as a separating agent. The glue surfaces of the coves can now be sparingly coated with glue and the parts clamped together. Make sure that the longitudinal marking on the hinge roller is aligned and that the parting lines are tight.
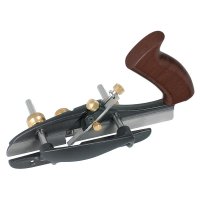
Flush cleaning the roller protrusion
When the glue has hardened, you can flush plaster the protrusion of the hinge with the smoothing plane. If all the joints are nice and tight when gluing, the hinge will be almost invisible when closed. We give further tips on the dimensional accuracy and fit of the wooden dowel and cove and on the quality of the surfaces of the wooden dowel in our video tutorial. In it, we also show you how to mill the cove on a milling table.