Toolbox according to Toshio Odate
"Japanese toolboxes," he writes, "are not meant for storage, but for transporting the tool." Therefore, no emphasis is placed on elaborate manufacturing, but only functionality and light weight are important. All the individual parts are only connected with nails and glue, yet the toolboxes are amazingly stable. No fittings are necessary because the lid is held in place by a clever sliding mechanism.
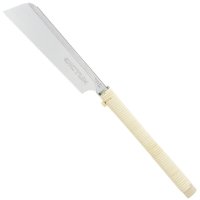
The model presented here follows very closely Odate's model. You can choose the exact dimensions yourself. The size of the box depends on the tools that should fit into it. With Japanese tools, it is usually the largest saw that determines the length. In our example, the material is gouged ash, 12 mm thick. The cutting was done on the circular saw and all surfaces are just planed and left raw.

Basic construction of the toolbox according to Toshio Odate
Marking and grooving
All measurements are taken or transferred directly from the workpieces. Use the handle blanks to mark the distance of the groove to the face and the sides for the width of the groove to avoid measuring errors.
The corner joint
As the joints are only nailed, small approx. 2 mm deep grooves in the sides help to hold the head boards in position during assembly. You have several options for making the groove:
- You scribe it with the knife and chisel out the groove with the chisel.
- After scribing, you saw the flanks at the crack and chisel out the waste in between.
- You can also use a base plane (with depth stop) to remove the waste.
or - Use a grooving plane. This plane must have two roughing cutters, as it is planed across the wood grain.
Once the grooves have been made, you can start assembling the carcase.
Gluing and nailing the corpus
Mark the positions for the nails and pre-drill them in a dovetail shape (alternating at a slight angle). This gives the nailed joint more pull-out stability. After pre-drilling, the outer surfaces are cleaned with a plane. The glue is applied in the groove and the sides are nailed.
You can then proceed directly with nailing on the bottom. This aligns the carcase at an angle and keeps it permanently at an angle. As with the sides, first mark out the position of the nails and pre-drill. Then also clean the bottom, indicate glue and nail the bottom on.

The alternating nails driven in at an angle give the joint more stability
Making the handles
Use slightly thicker material for the handles. For a better grip when carrying the box, the lower edges of the handles are bevelled slightly inwards. To do this, mark the bevel with the marking gauge and plane it. Since the bevel has no other function, this does not have to be very precise. Then round off the sharp edges a little and plaster the outer surfaces. You can now glue the handles to the headboards and nail them to the sides if you wish. Once the glue on the handles has dried, plaster the top edge of the toolbox flush. Then you can glue and nail the two previously cleaned and chamfered cover strips.
Making the lid
The lid is slightly longer than the opening between the cover strips. The lid must therefore first be slid diagonally under a cover strip and then rests on its two cover strips, which protrude sideways. The exact position of the cover strips on the cover must be determined. The lid should be able to be pushed in so far that both ends are equally far under the two cover strips of the carcase.

The lid is closed by a clever sliding mechanism
Before gluing and nailing the cover strips to the lid, you should clean and chamfer all parts with a plane. To ensure that the lid and the cover strips are joined as tightly as possible, use longer nails that protrude slightly from the inside of the lid after being hammered in. The nails are pre-drilled, hammered in and then the protruding tips are folded over. The diagonally running push handle is scribed on the lid, sawn off precisely and, after plastering, also glued and nailed. All remaining edges are lightly chamfered at the end.
With only a small amount of material and tools, you can build sturdy and attractive boxes in this way, which you can use not only for tools but also for storing all kinds of other things. And since it is quite quick, this technique is also ideal for elegant packaging of all kinds of gifts.

When the lid is closed, all dimensions X are equal