Braiding with leather straps is easy to learn and you only need a few tools to get started. You can use our small training workpiece as a key ring or unique furniture knob. In this post we will show you how to make 4-strand round braids and a simple, decorative end knot.
Tools and materials
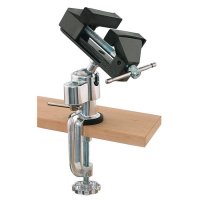
For round braiding you need a means to attach the workpiece to the worktable. A Multi-Angle Vice is very practical. A simple hook screwed into the table edge, however, will do at the beginning. You can use a Cutter Knife or small scissors (e.g. Nail Scissors) to cut the straps. You will also need a Belt Awl for knotting.
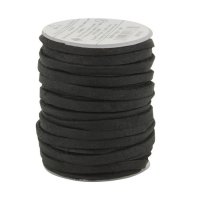
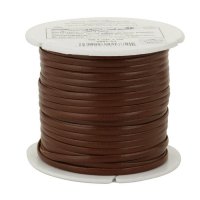
Suitable leather straps can be bought ready-cut, for example Deer Skin Laces, Kangaroo Laces or Cowhide Laces. If you would like to cut the laces yourself, this can be done easily and quickly with a Strap Cutter for Endless Laces. For our practice workpiece you will further need a key ring. If you use the finished workpiece as a furniture knob, the key ring serves as a pull-out protection; a small ring is sufficient for this.
Preparing the leather straps
Have two leather straps ready that are approx. 60 cm long. Taper all ends so that you can run them through more easily when knotting. The threading works even better if you rub the ends with a drop of white glue and let them dry in order to stiffen them a little. Before braiding, rub the straps well with Saddle Soap. This makes them supple so that they glide better when braiding and knotting.
4-strand round braid
Thread the two laces through the clamped key ring and bring the ends to the same length. Make sure that the skin side (the smooth side) of the straps is on the outside and cross the two straps as shown in the picture.

Tighten the straps and place the rightmost one from below between the two left straps.

Now place it over the inner of the two left straps with its skin side up so that it points to the right again. For round braiding, what comes from the right also goes back to the right and what comes from the left goes back to the left.


Now do exactly this with the outermost left strap: first place it from below between the two right straps and then over the inner of the two straps back into the left hand.


From now on, continue with the uppermost strap in each case, the outermost right strap is next. Tighten the strap well. It is now placed from below between the two left straps, then over the inner left one, again with the skin side facing out.


Now it's the turn of the outermost left strap. Tighten it, go under everything, through between the two right ones and over the bottom right, back into the left hand.
Continue until the braid is approx. 4 cm long.
4-strand end knot
You can now unclamp the key ring. Hold the braid so that the free ends point upwards and arrange the straps as shown in the picture on the right.


The knot is knotted clockwise. Start with a crown knot. To do this, the first strap is placed over the second, the second over the third (and the first), the third over the fourth (and the second) and the fourth strap is pulled through the loop of the first. Tighten the knot well.


In the next round we do the same knot, but upside down (the knot, not you!). The first strap goes under the second, the second under the third and so on, and finally the fourth through the loop of the first. Tighten the knot well again.


Make a second crown knot as described in the first knot step.


From now on you will need a braiding tool. The first strap is now passed under the strap underneath and the next free strap (the awl is pointing to the passed through strap in the second picture).
The next strap to the left (clockwise, seen from above) is also pulled through the strap below and the next free one. Finally, the last free strap is pulled under the one below and the first one, which is now already tightened.


This is what the knot looks like after tightening from below and above.


The free ends are now led down through the whole knot. To do this, pierce in the respective adjacent »V«.


Once all the free ends have been passed down and tightened, the knot looks like this. You can now cut off the free ends resulting in a relatively flat end knot with a braid pattern all around.


Another possibility is to lead the free ends back up through the knot. To do this, guide the first free end over the strap next to it on the right. Pierce the awl through the centre of the first crown knot and through the whole knot.


This is how the knot looks when all ends are done.
The knot is finished, the ends cut off and additionally halved lengthwise.
If you want the knot to have the extra ring but no fringes, you can cut the ends very close to the knot and tuck them back into the centre cross of the knot after all the ends have been passed through the centre and tightened.