A self-made knife needs an individual sheath. It should match the function and appearance of the knife. We give you tips on how to develop your knife sheath from scratch and what you should bear in mind when building the prototype.
Collect ideas
First look at different knife sheaths. What do you like, what functions do the different designs offer, and what could be improved? What shape would go well with your knife? What would you like to do with your knife, and which sheath would be practical?

The features of other knife sheaths can be combined in your designn
Choice of material
Knife sheaths are usually made of leather. However, there are other materials that are suitable for protecting a blade. For example, in our video on Designing and Building your own Knife Sheath (German version), we combined a leather sheath with a safety inlay and a belt clip made of Kydex. Knife sheaths can also be made from wood, as with some Japanese hunting knives.
Craftsmanship
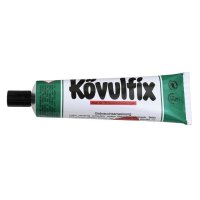
What skills do you have, or would you like to learn to put the construction of the knife sheath into practice? A classic saddle stitch (German version) is probably the best technique for a classic leather sheath, but also one that many have to learn first. It is easier to do it with a simple braided seam or by gluing and riveting. Would you like to adapt the leather to the shape of the knife using the so-called “wet moulding technique”? With Kydex, you can make similar shapes to the “wet moulding technique” comparatively easily. In addition, knife sheaths made of Kydex are usually only riveted and screwed. You can find more information on this in our video tutorial Kydex — 4 examples (German version).

The saddler's seam is robust and ideal for knife scabbards.
Pattern development
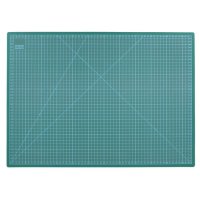
Now that your ideas have become concrete, and you know what material and technique the scabbard should be made of, the next step is to develop a first pattern on paper. The development of the pattern is a complex process that involves all the aspects mentioned above. You will need sturdy paper with approx. 300 g/m² or thin cardboard. In addition to drawing tools such as pencil, ruler and set square, you will also need all materials and semi-finished products (leather, wood, rivets, push buttons, safety inlay, etc.). It is helpful to have a caliper gauge to determine the thickness of materials and clamps to temporarily join materials or parts and measure them.
At the beginning of the pattern development, draw the contours of the knife on the sheet of paper. Around this shape, you gradually develop all the components of your knife sheath. Usually, you start with the actual sheath in which the blade will be placed. Keep in mind the thickness of the material and the bending radii of the material. Thin leather, for example, wraps around the blade more easily or more tightly than thick leather. To determine such variables as bending radii and stiffness, it is imperative to have the materials handy.
Next comes the upper part of the sheath with the clasp that holds the knife in the sheath and the suspension (e.g., one or two belt loops or an eyelet for a neck strap). This is how the basic shape of the scabbard is gradually created. A knife scabbard usually consists of several parts such as the baseplate, the front part, the closure strap and the belt loop. However, it is also possible to make the complete sheath from a single piece of leather. In our video (German version), we show this development process step by step.

The pattern is designed on hard paper

On the prototype of the knife sheath, improvements to the knife sheath are easy to see
Prototype
After all ideas have been incorporated into the paper pattern, cut out the parts. You can already check some details based on these patterns. For example, you can often see whether enough material has been added for seams or rivets.
The paper patterns now serve as templates for transferring the shapes to the chosen material. When marking out, make sure that the patterns are right side up and are not accidentally transferred mirror-inverted!
Now cut the parts of your knife sheath and turn your idea into a first prototype. If you want to build the knife sheath from a high-quality, expensive leather, it is recommended to build the pattern from an inexpensive leather. In this step, it is only a matter of checking the design for feasibility, accuracy of fit and functionality. As a rule, you will now notice one or two weak points. This can be, for example, an error in the manufacturing process, if an eyelet cannot be fitted perfectly after sewing. The position or angle of the clasp or belt loop may also turn out to be suboptimal. Perhaps the look of the knife sheath is not what you had in mind. You can note or draw in all changes on the paper patterns. With these improvements, you make another prototype or, if there are only minor changes, the final sheath.
Failing
It is quite normal in such a development process that not everything will work out right away as you had imagined. Some ideas seem ingenious, but turn out to be impractical in implementation. Errors in the manufacturing process are typical. The more parts that have to be put together, the easier it is for a mistake to happen in the process. By producing a prototype, you can easily identify the possibilities for improvement. The development process is much more time-consuming than the final implementation. If, for example, it took you a day to make the first draft of the knife sheath, you know the process exactly and know which work steps have to be done in which order. Changes and improvements to form and function are quickly implemented, and the second knife sheath is finished in a few hours, according to experience. And this knife sheath is then the ideal complement to your self-made knife.