This bottle carrier stool can hold six bottles and is also handy to take on the go. You can make it yourself with a bit of craftsmanship and a few simple tools.
Material and cutting list
| 18 mm three-play board/multiplex or similar | |
|---|---|
| Seat | 340 x 210 mm |
| 2 side panels | 400 x 210 mm |
| Front/Back | 610 x 130 mm (makes 2 pieces) |
| 6 to 10 mm thick plywood/solid wood or similar | |
|---|---|
| Bottom approx. | 272 x 182 mm |
| Rods/ dowels Ø 8 mm or 10 mm |
|---|
| 3 divider rods in total approx. 720 mm |
Glue, screws (3.5 x 35 mm wood screws), 2 washers and oval head screws
Tools and machinery
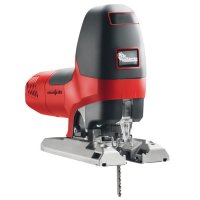
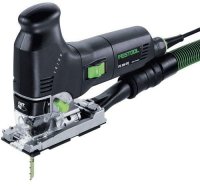
As basic equipment, you will only need a a jig saw (e.g. MAFELL P1 cc ), a drill with a 10 mm wood drill bit and a few hand tools such as a hammer, file and sandpaper. These tools will enable you to assemble the bottle carrier stool yourself. A circular bench saw (e.g. MAFELL Erika 85) is useful for cutting. You can also use this saw to cut the grooves for the bottom part in the side, front and back panels. For this purpose, we used a router table with an 8 mm Grooving Cutter in our video (german). On the router table, we also rounded off the corners of the seat using a template and a Trimming Bit. We also used an edge router to round off the edges. You can easily carry out this step using a file and sandpaper.
1. Cutting and marking
Cut the pieces according to the cutting list. Cut the two parts for the front and back only after milling the groove for the bottom. Then mark out the seat on the underside and the side panels on the inside. If larger splinters are left when sawing with the jig saw, they are less visible on these sides. The construction plan shows all dimensions for the cut-outs and joints. Our bottle carrier stool is designed to hold six standard beer bottles. By slightly modifying the dimensions, it can also be used to carry wine bottles or cups (for outdoor use and sporting events).

You can download the construction plan incl. cutting list here
2. Rounding the corners
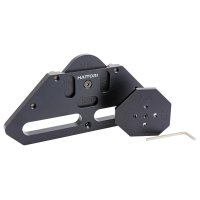
If you want to round off the corners of the seat using a Routing Template for Round and Bevelled Corners on the router table, like us, now is the right time to do it. All the edges are still straight and the template is easy to apply. You can find a detailed description on how to do this in our blog post How to circle the square. If you want to round off the corners with a File and Rasp, you can also carry out this step after sawing the cut-outs.
3. Drilling and sawing the handle openings
The easiest way is to drill vertically through the curves for the handle openings with a large Forstner bit (Ø 35 to 40 mm)(e.g. Forstner Bit, Set) and then join these holes straight with the jig saw. Alternatively, you can use the jig saw to cut out the holes completely, including the curves.
Set the jig saw's pendulum to zero. Sawing will take a little longer, but the saw cuts will be cleaner and more accurate.

The jig saw is used to join the holes with slot holes
TIP: When inserting and removing the jig saw in the holes or cut-outs, the saw should be switched off and the saw blade should be stationary. Otherwise, the oscillating blade is likely to strike the surface and leave unsightly marks.
4. Slits and recesses for joints
Now use the jig saw to cut out all the slits and recesses for the joints so that the seat can be fitted. Check the width or depth of the slits and recesses with a leftover piece of the board material used. Most of the cut-outs will be exactly this size.
5. Grooves for the bottom part/h2>
We placed the plywood bottom part loosely in a groove so that the wood can warp. To do this, cut or mill approx. 5 mm deep grooves into the inside of the side, front and back panels. We have left the front and back together on one piece. The groove is cut 5 mm from the bottom edge. Then insert the part into the recess on a side piece provided for this purpose, transfer the position of the groove and set the machine accordingly. Now you can cut the groove into the side panels. Alternatively, you can simply screw the bottom in or lay it on battens. You will then need to adjust its dimensions accordingly.

The position of the groove is transferred to the side panels
6. Drilling holes for divider rods
The bottles should stand securely in the bottle carrier stool even when the seat is placed on it. This is achieved by inserting three divider rods, one long and two short. Mark the position of the rods and drill holes with the appropriate diameter through the side, front and back panels as vertically as possible.
7. Rounding off and grinding
Before starting assembly, round off the sharp edges on the seat, especially along the handle openings. Then grind at least the inner sides of all boards and the bottom.

Using a router, you can round all edges quickly and evenly
8. Assembly
There are several ways for assembling the bottle carrier stool. You can simply screw it together with wood screws or even nail it together. You can also use wooden dowels to join the pieces together. We screwed it together with wood screws in blind holes and then hid the screws behind wooden dowels. When assembling, put some wood glue (e.g. Bindan-P »Propeller Leim«® Wood Glue) in the recesses for the front and back boards. The bottom panel is only fitted loosely, as described. When assembling, make sure that the parts are fitted at right angles. Once the seat is inserted into the side slits, it can give an extra hand during assembly.
9. Grinding and finishing
If necessary, cut off any protruding dowels with a flush cut saw (e.g. Kugihiki 180) so that they are flush with the surface and the bottle carrier stool with seat is finely ground. If the bottle carrier stool is to be a Father's Day gift, you can decorate it with a nice saying and the name of the recipient. We recommend treating the surface with Danish Oil or NL Hard Oil to protect it from moisture and dirt.
10. Extra: Seat safety device
You can make your own simple safety device with two washers and screws so that you can lift the seat without separating it from the stool. The locking washers are levelled parallel on two sides so that they are slightly narrower than the thickness of the material. They are then screwed in with the screws (raised countersunk head or flat head) in the middle between the two upper rods. Do not tighten the screws too much so that the washers can be turned easily and thus hold the seat on the bottle carrier stool.

The seat is locked by turning the washer