Especially when it has snowed, many birds find only little food during the cold season. So, we built a small bird feeder from plywood scraps. The special thing about this mini project, is that there are only a few measurements to set when cutting and you only need a few tools to build this food dispenser.
Material
We used 10 mm poplar plywood that was left from other projects. Since only a little material is needed for the feeder, you will certainly find suitable material in your workshop. You could also use other material such as multiplex boards, glued wood and solid wood scraps.
Construction plan
The construction plan is designed for a material thickness of 10 mm. For other material thicknesses, just adapt the dimensions accordingly. If you have enough material available, you could extend the silo upwards or enlarge the whole bird house to provide the birds with even more food.

Simply click on the image to download the construction plan
Cutting the parts to size
Use a circular bench saw, bandsaw or portable circular saw with guide rail to quickly cut to size. Start with three strips. You need one strip (80 mm wide and approx. 700 mm long) for the feeder and floor, one strip (25 mm wide and approx. 500 mm long) for the border and one strip (180 mm wide and 250 mm long) for the roof. The strips are then cut into pieces according to the list below.
Exception! First cut the two side pieces (110 mm long each) and the bottom (140 mm long) from the 80 cm wide strip. Mark the centre of the remaining piece of the strip (it should be at least 300 mm plus the saw cut) and drill a hole there with a diameter of approx. 50 mm. Then cut the piece in halves to get the front and rear sides of the house (each 150 mm long). Now cut the gable on both parts (2 x 45°). Don't throw away the gable offcuts, two of them will be needed later!

After drilling, separate the gable parts
Feeder and floor
Strip with 80 mm width, divide into 2 x 110 mm, 1 x 140 mm and 1 x approx. 302 mm (= 2 x 150 mm)
Border
Strip with 25 mm width, divide into 2 x 140 mm and 2 x 100 mm
Roof
Strip with 180 mm width, divide into 1 x 120 mm and 1 x 130 mm
(All dimensions refer to 10 mm material thickness)
Assembly
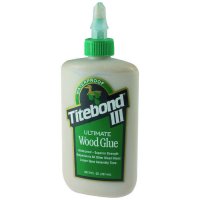
For assembly, you need 3 x 20 countersunk screws and waterproof wood glue (e.g. Titebond III Ultimate).
Start assembly with the base plate and mount the border. Since the bird house does not have to withstand heavy loads, two to three screws are sufficient to connect the parts. Pre-drill holes in the core diameter of the screws (3 x 20 screws = 2 mm) for all screws to prevent the plywood from cracking. The base plate finished, assemble the actual feeder from the two gable parts and the sides. Note that the sides are set between the gable parts! Glue and screw the two parts of the roof with three screws. Sand all assembled parts before continuing.
Put the feeder centrally on the base plate. The silo is only screwed to the floor and not glued, so that you can clean it thoroughly in case of heavy soiling or after the winter season.
Then place the roof on the gable. To prevent it from slipping forwards or backwards, glue two of the small triangular sections (leftovers from cutting the gables) inside, 30 mm apart from the outer edge of the roof (the feeder must fit well between them).
If you want to vary the roof, do not make its overhang too large. It has been our experience that birds accept the feeder better if they have a good all-round view when pecking and are not »shaded« too much from above.

All parts are glued and screwed together
Suspension
Almost finished! The bird house still needs a cord so that you can hang it up. The cord also makes it possible to open the roof and fill the feeder with birdseed without losing the roof.
Drill a hole in each of the two gable sections at a distance of approx. 30 mm from the tip of the gable. Pull a cord through these holes and knot their ends so that the cord is as tight as possible. Alternatively, you can also glue in a thin wooden stick (skewer). Now drill two holes in the centre of the roof from the inside to the outside through its gable, distance from the centre approx. 30 mm in each case. Pull a longer cord through the two holes in the roof from the outside. You can now tie the ends of the long cords to the cord between the gable sections (this prevents the roof from possibly not closing properly due to the tension of the cord). Hang the bird house with the long cord.

The roof is also held in place by the hanging cord.
Weather protection
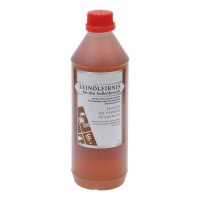
Plywood is not weatherproof, so the bird house must be given a suitable surface treatment. For this purpose, use environmentally compatible surface agents such as Boiled Linseed Oil for Exterior Use, Hard Oil Wax or Tung Oil. If you want to colour your bird feeder, we recommend linseed oil paints. You can also protect and embellish the roof with a few strips of Birch Bark or self-split mini shingles instead of roofing felt.
Design options
We chose the dimensions of the bird house based on the material available to us. You are welcome to change and adapt them. We have chosen a very simple construction method in order to achieve a useful result as quickly as possible. With a little more time and creativity, you can give your bird house its own character by, for example, mitre-cutting and gluing the parts or using wooden dowels