In this nest box, the bird brood of tits, sparrows and co. is safely protected from martens like weasels, or ermines. A ledge prevents them from stealing the small birds from the nesting hole. In addition, the ledge offers the adult birds an opportunity to rest or dry out when the weather is bad. In these instructions, you will learn everything you need to know about building this nest box and what you need in terms of materials and tools.
Tool list
- Saw for cutting (circular saw)
- Saw for the notches (band saw or jigsaw)
- Drill/rechargeable screwdriver
- Suitable bits and Forstner bits
- Hammer
- Clamps
- Rasp and steel wire brush
Material
Solid wood is best for building a nest box. Boards made of weather-resistant wood such as larch, pine, oak, or ash are ideal. If you use board material, make sure that it is glued waterproof. In addition to the wood, you will also need waterproof glue (e.g.,Titebond II Premium Wood Glue), nails and/or wood screws.
Cutting plan and blueprint
Download our PDF with the material list and the blueprint here. In it, you will find the dimensions and the positions of all parts. The size of the nest box is designed for small birds such as tits, sparrows, or wrynecks. For larger birds such as starlings, you can enlarge the box as required. The drawing is designed for a material thickness of 18 mm. For other material or board thicknesses, you must adjust the dimensions accordingly.

In the blueprint you will find all the dimensions for building the nesting box
Material: Larch/pine/oak/ash, 18 mm thick
All dimensions in millimetres
| 1. roof | 250 x 190 |
| 2. back wall | 260 x 124 |
| 3. floor | 124 x 124 |
| 4. maintenance cover | 150 x 124 |
| 5. heel board | 60 x 124 |
| 6. entrance hole board | 70 x 160 |
| 7. sides (2x) | 260 x 202 |
| 8. cover strips (2x) | 160 x 20 |
| 9. end strip | 160 x 40 |
| 10. hanging rack | 400 x 40 |
Working steps
1. Cutting to size. Cut the wood according to the cutting pist. The easiest way to do this is to use a circular saw (e.g., Mafell Erika 60 ).2. Cut the side parts. The side parts are notched 60 mm deep at the front edge with a jigsaw (e.g., Festool PS 420 EBQ-Plus ) or band saw and cut at an angle at the top edge to obtain the roof slope.
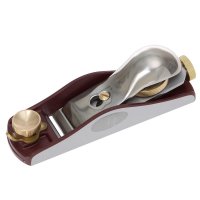
3. Chamfer the roof, back wall and entrance hole board. To ensure that the roof lies flush on the side parts, you must bevel the back wall and the flight hole board at the top edge. The roof is chamfered at the rear edge. You can transfer the angle of the bevel from the cut side parts. If you cut the parts with the circular saw, you can also cut the bevels directly when cutting. You can plane the bevels later (e.g., with a DICTUM Block Plane, 12°, SK4 Blade ).
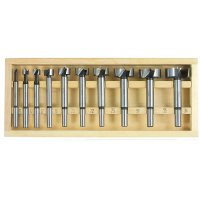
4. Drill the entrance hole. The size of the entrance hole depends on the bird species that is to breed in the nest box. You will find an overview of common diameters below. Drill the entrance hole with a suitable Forstner bit (e.g., Forstner Bits, 10-Piece Set ).
5. Air holes in the floor. Drill four small holes in the bottom of the nest box so that the box is adequately ventilated and moisture can drain away.
6. Roughen the inside. Use a wire brush or rasp to roughen the inside of the side panels and the maintenance cover so that the young birds can climb them more easily.

The parts of the nest box are nailed or screwed together
To do this, slide the maintenance cover into its future position in the body and mark the top edge of the end strip on the cover. This is the position of the lower cover strip.
After this has been fitted, push the lid back in and open it so far that it can be pulled out downwards. Now place the upper cover strip against the heel and mark its lower edge on the cover. You can now align the second cover strip with this mark and mount it. If the cover cannot be inserted or opened at this point, you can trim or chamfer the lower edge of the maintenance cover until the cover has enough room to open easily. In the video, you can see exactly how the cover is fitted.

The parts of the nest box are nailed or screwed in place
What size should the entrance hole of a nest box be?
The size of the entrance hole must be drilled to suit the species of bird that is to incubate in the nest box. Since our box is more suitable for smaller bird species, the following diameters come into question:
26 to 28 mm for small tits such as blue tit and coal tit.
32 to 34 mm for great tits, nuthatches, and sparrows.
Some bird species prefer a high oval instead of a round entrance hole. For redstarts and wrens, this should be approx. 48 × 32 mm.
If you enlarge the dimensions of the nest box a little, you can use the same plan to provide nesting aids for larger birds. For starlings, the entrance hole can easily have a diameter of 45 to 55 mm.
How and where to hang the nest box?
Hang the nest box in a place protected from the weather. It should neither hang in the rain nor in the blazing sun. Align the entrance hole away from the side that is mainly exposed to wind and precipitation.
Hang the nest box in a place protected from the weather. It should neither hang in the rain nor in the blazing sun. Align the entrance hole away from the side that is mainly exposed to wind and precipitation.
Which paints or varnishes are suitable for nest boxes?
If the nest box is made of a weatherproof wood (larch, pine, oak, ash) and hung in a weather-protected location, it can do without additional surface protection. Otherwise, the environmentally friendly hard oils and hard oil waxes from Asuso are suitable for painting the nesting box. If you want to paint the box colourfully, you can get creative with linseed oil paints, for example.