How about the dimensions of a wooden dowel?
If possible, the diameter of a wooden dowel should be one third of the material thickness used (example: with 18 mm panel thickness, use dowels with 6 mm diameter). The length of the dowel also depends on the material thickness and additionally on the type of dowel connection. If the dowels are visible from the outside (a through joint, where the dowel is drilled completely through a workpiece into the counterpart), the length of the dowel should be approximately three times the material thickness. With blind joints (the wooden dowels are not visible from the outside), you can choose a length between two and two and a half times the material thickness. More often than not wooden dowels are not available in exactly the right size. It is then better to opt for a slightly larger diameter than to use a dowel that is too short or too thin.
How do I mark the positions of the dowels?
3 tips on marking the dowel positions
1. Marking reference edges
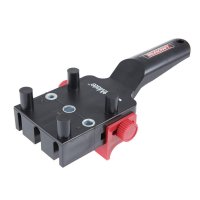
Set a reference edge on each workpiece that will serve as a starting point for measuring and marking and thus enable you to mark the position of the wooden dowels exactly. In the simplest case, this could be the edge marked with the carpenter's triangle. In addition, you can mark the outer sides at the corners where the dowel joints are to sit (dowel machines such as the Duodübler or the Domino dowel jointer and dowel gauges are usually applied to the outer edge).

With classic marking tools, positions can be marked precisely
2. Mark the dowel positions with marking gauge and compass
There are numerous tricks on the internet for marking the holes (with tape or paper strips, etc.). However, if it needs to be precise, classic marking tools are still a good choice. First mark out the centre line on the edges and end faces with a marking gauge. Then set a starting point (centre of the workpiece or fixed distance to the reference edge). Now set a compass to the desired spacing of the holes and use it to mark the positions of the dowel holes, always starting from the starting point.
3. Measure only once
Transferring measurements is more accurate than re-measuring them several times. You can mark the centre line on all workpieces. However, the positions marked with the compass are subsequently transferred with a square or, after drilling, with dowel markers.
What should I bear in mind when setting wooden dowels?
3 tips for drilling
1. The correct sequence when positioning the wooden dowels
For blind dowels in solid wood, drill into the end grain first, as here the drill is more likely to drift. Even if the hole is a little out of place, you can transfer the position afterwards with dowel markers. For visible through joints, clamp the workpieces together as they are to be assembled and drill through the longitudinal piece from the outside. With board material (chipboard, MDF, OSB, etc.) the order of the holes plays a subordinate role.

Dowel gauges facilitate the exact drilling of the dowel holes
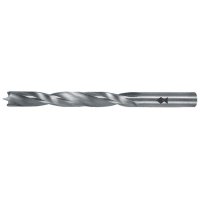
2. Drill dowel holes deep enough
Wooden dowels push some of the glue in front of them when they are inserted. The total length of the hole should therefore be approx. 3 mm deeper than the total length of the dowel. This creates a »glue chamber« that can hold excess glue.
3. Countersinking holes for wooden dowels
After drilling, you can slightly chamfer the upper edge of the holes with a countersink. This makes it easier to apply glue and insert the dowels, the workpieces slide together more easily during assembly and the countersink creates additional space for glue to ooze out.
How can I mend a botched dowel hole?
3 tips for what to do after drilling and before assembly
1. Use a test dowel
To test whether the joints fit and are drilled deep enough, it is best not to use a wooden dowel in its original size, as it may swell in the joint during trial insertion, get stuck and break off when you try to pull it out. Make a few test dowels instead. These are wooden dowels that you sand a little on the outside or drive through a dowel cutter with a 0.5 mm smaller diameter. These test dowels can be easily pulled out of the holes by hand afterwards.

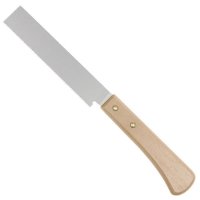
Use a flush cutting saw to saw off the dowel flush in the failed bore hole
2. How do I correct drill holes that are out of place?
If a hole is not in the right position, you can plug the hole with a wooden dowel. When the glue has dried, saw the dowel flush with a flush-cutting saw and smooth the surface. Now you can drill a new hole in the right place with the help of an auxiliary jig (hardwood block with a drill hole in the same diameter as the dowel holes) or a dowel jig.
3. Always chamfer wooden dowels
Always chamfer shortened dowels or wooden dowels cut from dowel rods or round timbers at both ends (e.g. with a pencil sharpener). Straight sawn-off wooden dowels are harder to insert into the holes and push the glue in front of them. With chamfered ends, the glue spreads better at the tip and in the grooves.
Where do I put the wood glue – onto the dowel or into the hole?
3 tips for assembling dowel joints
1. Always put the glue into the holes, and never onto the dowel
The glue causes the wooden dowels to swell so that they sit firmly in the joint. If you put the glue onto the dowel, it may already swell before it is in the hole. We recommend spraying the glue all around the inside of the hole, e.g. with a glue bottle with a spray nozzle.

Mit einer dünnen Spritzdüse lässt sich der Leim in der Bohrung ringsum verteilen
2. Insert wooden dowels into the deeper holes first
If possible and especially with larger parts and complex workpieces, wooden dowels are inserted first into the components with the deeper holes. Since it is then the shorter part of the dowel that sticks out, the workpieces can be aligned and assembled more easily.
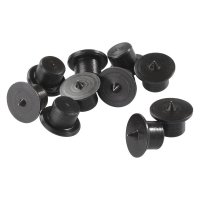
3. Use weatherproof dowels outdoors
Beechwood is less suitable for outdoor use. It is more likely to warp and is not very weather-resistant. For outdoor furniture, you should therefore use weatherproof dowels made of Sipo mahogany, bangkirai or special dowels (e.g. KNAPP dowels).