Combination machines are very popular among the woodworking community. A machine that has a variety of uses not only saves on investment costs but also space in the workshop. The DICTUM BS 200-08 is a compact bandsaw for small workshops, ideal for model making and small furniture building projects. Equipped with the sanding belt guide, the BS 200-08 can not only perform straight and curved cuts but also sand efficiently. This article introduces you to the sanding belt guide and answers the most important questions.
For which bandsaws is a sanding belt guide available?
As of February 2024, the Sanding Belt Guide is available for retrofitting older DICTUM BS 200-08 bandsaws (pre-2024). The current model series of the BS 200-08 is supplied with the sanding belt guide. Suitable sanding belt guides for additional DICTUM bandsaws are expected to be available from mid-2024 onwards; for the most current information, please refer to the Bandsaws and accessories section.
Do I need to modify my band saw for sanding?
Yes, older DICTUM bandsaws can be retrofitted very easily. To use the sanding belt guide, the band saw needs the appropriate mounting saddle. This just involves removing the upper saw blade guide once and replacing the existing mounting saddle with the new version. Detailed instructions are included with the sanding belt guide. After that, you can insert both the sanding belt guide and the saw blade guide into the new mounting saddle. Switching between the two guides takes only a few minutes.

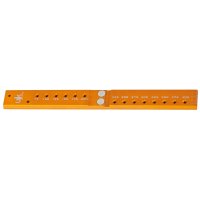
Old and new mounting saddles, the new one has an additional hole for the sanding belt guide
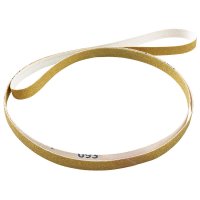
Which sanding belts do I need?
With the sanding belt guide for the BS 200-08, you can use sanding belts with a length of 1400 mm and a width of 10 to 15 mm. Suitable sanding belts with grit sizes ranging from 80 to 320 are available in the DICTUM online shop.
How do I adjust the sanding belt guide?
Use a small combination square or a test angle to align the sanding pad at right angles to the saw table. There are small grub screws on the cross connector, which are used to fix the settings or the position of the sanding pad. For precise angular sanding, the sanding pad should be as close as possible to the sanding belt. By adjusting the height of the saw blade guide, you can also adjust the vertical position of the sanding guide to suit the intended use. More on this later!

Align the sanding pad at a right angle to the machine table
How do I fit or change the sanding belts?
The sanding belt is changed or fitted in the same way as when changing the saw blade. Disconnect the machine from the power supply and open the upper and lower doors. Then slacken the saw blade/sanding belt at the upper wheel and remove it. Thread the new sanding belt through the slot in the machine table and place it on the upper and lower rollers. Tension the sanding belt slightly. Turn the upper roller by hand and adjust it so that the sanding belt runs in its centre. Tension the sanding belt a little more, but not as much as a bandsaw blade. The sanding belt can stretch much further than a band saw blade and will yield to high tension. If the tension is too high, there is a risk of the sanding belt touching and damaging the safety switch on the upper left of the door.
What sanding tasks can I perform with the sanding belt guide?
The sanding belt guide allows you to perform a wide range of sanding tasks on the DICTUM BS 200-08. For finishing straight, right-angled edges, position the sanding pad directly on or just above the machine table. This allows you to sand the edges of workpieces with a material thickness of up to 57 mm at a right angle, for example to smooth rough-sawn surfaces. This works on straight edges and external curves.

The sanding pad is 57 mm tall
For sanding internal curves, you can attach semi-circular cauls to the sanding pad. The sanding shoe has two countersunk holes for this purpose, so you can easily screw in the cauls. Adjust the sanding pad with the caul so that the sanding belt just touches the caul. A slightly lower belt tension makes it easier for the sanding belt to adapt to the caul.

Cauls enable the sanding of internal curves and hollow grinds
You can raise the sanding guide by approx. 20 mm at any time by adjusting the height of the belt cover or belt guide. This allows you to sand cut-outs starting from 1 mm in width. For thicker materials, you can also simply turn the sanding shoe upwards or temporarily remove it completely.

Narrow cut-outs can also be processed on the sanding belt guide
The sanding pad and cross connector are chamfered on their reverse, allowing the machine table to be tilted up to 45°, even when the sanding guide is positioned closely above it. This is ideal for chamfering straight and curved edges, for example, to grind a »Swiss edge« on a round plate.

With the machine table tilted, chamfers up to 45° are also possible