Functional and fashionable. Leather belts do more than just prevent trousers or skirts from slipping; they are also a stylish accessory that draw attention which is even more rewarding when you have made the belt yourself. In this tutorial, we will show you various ways of doing this and suggest which materials and tools you will need for the different production techniques.
The belt strap
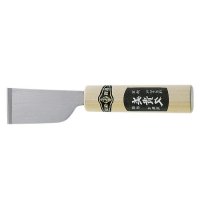
You can either use a pre-made belt blank or cut the belt yourself from a leather hide using a strap cutter or a ruler and cutter knife. The length of the strap should be at least the hip circumference plus approximately 40 cm for the buckle fold, belt tip, keeper loop, and free sliding loop. The width of the belt depends on the buckle used. For the belt in our video (german), it is 38 mm.

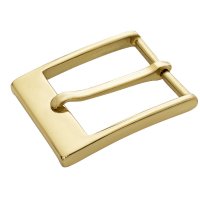
A leather belt consists of at least a belt strap and a buckle. All other parts depend on the method of production.
The fold
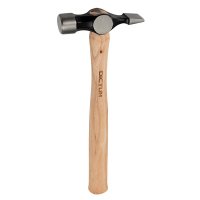
The belt buckle is usually held in place by what's called a fold. It should be long enough to hold the keeper loop. 10 cm is usually sufficient. The fold is skived (thinned out) to half the leather thickness but should be at least 2 mm thick to provide sufficient stability. Skiving is quickly and accurately achieved using a leather-splitting machine. Skive the end of the fold tongue to zero so it lays flat and nothing protrudes on the reverse of the belt. Use a mallet or hammer to gently tap the fold into a crisp fold. To make the leather more supple, you can moisten it at the fold line on the upper rough leather side with some water. Give the leather time to fold, otherwise it may break.
The prong hole
Create an oblong hole for the prong of the belt buckle by punching a hole through both layers of leather at a sufficient distance from the fold, using punch pliers or a hole punch. Then, starting from the hole, cut the leather to the fold with a utility knife. Fold the leather over the buckle and test whether the prong moves freely. If not, extend the prong hole as necessary. Round the edges around the fold with an edge beveller, but only on the skin side/grain side of the leather.
Keeper loop and sliding loop
The leather piece from which the keeper loop and possibly a second sliding one are made should have a length that is approximately three times the width of the strap. The loop and slider are also skived or split to half thickness or at least 2 mm. You can cut their width as desired; we have opted for 15 mm. To determine the exact length of the keeper loop, place one layer of the fold (half material thickness) and one layer of the strap (full material thickness) on top of each other, and wrap the leather strip tightly around both layers. Allow the ends to overlap by about 10 to 15 mm and skive them to zero at this point. If a sliding loop is desired, prepare it in the same way, but use two layers at full leather thickness to determine the length. For both the loop and slider, round and smooth the edges before glueing them at the overlap. For the sliding one, you should additionally sew the overlap.
Belt assembly
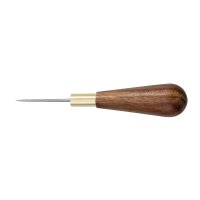
You can simply sew in the belt buckle and loop or attach them using screw rivets, for example. If you are sewing in the belt buckle, first glue it in place in the fold. Use a contact adhesive for this purpose. Make sure that you insert the buckle the right way round and don't forget the loop. There should be space for at least three stitching holes between the buckle and the loop. You can easily determine and mark the exact position with a 3-prong thonging chisel. After the glue has been well pressed and hammered, you can sew the fold. The seam crosses, or rather goes through, the keeper loop and extends at least one stitch beyond the end of the fold tongue.
Instead of glueing and sewing the buckle, you can also close the fold with rivets. If you use screw posts, the fold can be re-opened, for instance, if you want to change the buckle or if a repair is necessary.
How to determine the belt length
Now that the buckle end of the belt is complete, it's time to work on the other end. To determine the length and exact position of the holes, proceed as follows: The measurement from the front inner edge of the buckle to the centre hole corresponds to the measured hip circumference of the person for whom the belt is intended. Two additional holes are punched on both sides of this hole. The distance from the foremost hole to the tip must be chosen so that the tip can still be caught by the loop.

The final length of the belt is determined by specific points
Punching the belt holes
A leather belt typically has five holes. A belt hole position template is very handy for marking the holes and the tip. The distance between the holes usually corresponds to the width of the leather strap. Punch the holes with punch pliers or a hole punch and cut the tip with a utility or half moon knife. You can choose the shape of the tip freely. A gothic arch with a rounded tip is classic and can be punched with a point strap end punch. However, other shapes like a semi-circular or an asymmetric tip are also possible. Now, you should round, smooth, and polish all the belt’s edges from both sides with an edge beveller. Finally, rub your homemade belt with a bit of leather care product, so it will serve you well for many years.