With an appropriate clamping device, a circular table saw can perform not only the usual cutting work but also special operations such as the production of mortises and tenons, mitre cuts, grooves, rebates and much more. With router tables and workbenches, it is also very practical to have a versatile clamping device at hand. DICTUM course instructor Roland Heilmann has developed the Multi T-track Clamping Device (MTS) for this purpose.
What can I use the Multi T-track Clamping Device for?
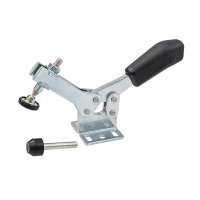
The MTS enables you to clamp long workpieces vertically to a circular table saw and machine them, for example, to produce mortise and tenon joints or to cut acute angles for compound mitre cuts. Depending on the diameter of the saw blade, long mortises and tenons can also be created. The maximum workpiece length is limited only by the height of the room ceiling. The workpiece is fastened to or in the Multi T-track Clamping Device with lever clamps or horizontal clamps. The MTS is then guided along the rip fence like a sliding table. Two sturdy dowel rods serve as handles for safe guiding. If you use a pull-push saw such as the MAFELL Erika 85, you can also clamp the MTS to the rip fence.

The MTS enables you to machine workpieces upright
Material needed for the Multi T-track Clamping Device


The MTS essentially consists of two T-track panels
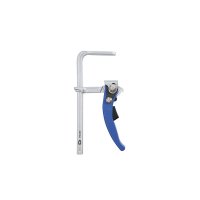
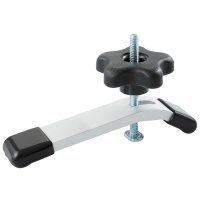
Our Multi T-track Clamping Device is made of multiplex boards with a thickness of 21 mm. These can be either raw or coated. The MTS consists of two panels with T-tracks, mounted at a right angle, accepting DICTUM All-steel Bar Clamps for Guide Rails and Hold Down Clamps for DICTUM T-Tracks as well as Sliding Pieces for additional stops and star knob screws.
| List of materials | Dimensions in mm | |
|---|---|---|
| 1 x birch multiplex | 620 x 305 x 21 | (Part 1) |
| 1 x birch multiplex | 620 x 225 x 21 | (Part 2) |
| 2 x birch multiplex | 620 x 70 x 21 | (Part 3 and 4) |
| 2 x rods, screws, dowels | Ø 30, length 200 | |
| Screws, dowels |
How to make a Multi T-track Clamping Device
For making a MTS you should be familiar with the correct and safe operation of a router. Make sure that the routing direction is correct! Use eye and ear protection, as well as an appropriate dust extraction device. Download cutting list and sketches
1. Milling the T-tracks
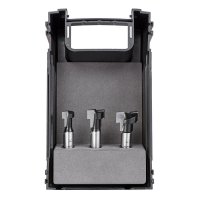
You will need a T-track Cutter M8, a router with at least 1000 W power (e.g. Festool Router OF 1010 REBQ), a rip fence and an additional fence for routing parallel tracks.
For the first T-tracks milled close to the edge, the router is guided with the rip fence. Set the milling depth to 12 mm. Long stop jaws are helpful. The Festool OF 1010 we use has a rip fence with short, non-adjustable stop jaws. We have therefore replaced the plastic jaws with a bar approx. 300 mm long so that safe freehand guidance is possible without tilting. With the rip fence modified in this way, the first T-tracks are milled parallel to the workpiece edges all the way around.

A continuous bar as a fence prevents unintentional tilting
In order to mill the next tracks with a constant distance to each other, you need a guide aid with guide bar. The Multifunction Router Base CRB 7 is perfect for this. The guide rail has a cross-section of 8 x 11 mm, length approx. 340 mm. It is mounted directly on the CRB 7. In order to prevent the thin rail from bending, we drilled two additional holes into the plastic panel of the CRB 7. When mounting, make sure that the rail is positioned at right angles to the base plate to ensure that the tracks are parallel. The router now sits on the plate of the CRB 7 and thus the previously set routing depth is no longer correct. Be sure to readjust the routing depth before milling the other tracks! We secured the workpieces with additional 21 mm thick boards in a kind of guide frame. This prevents tilting when starting up and at the end of the track. Mill all remaining T-tracks with these settings.

Milling parallel tracks with the CRB 7 and an appropriate fence
Tip: With uncoated boards, always mill against the grain first, and only mill in the direction of the grain afterwards. This will prevent unsightly tear-outs at the crossing points.
2. Assembling the individual parts
Dowel joints ensure that the workpieces form exact corners. We used the Festool Joining Machine DOMINO DF 500 for this. Alternatively, you can also use other joining systems, e.g. the MAFELL DuoDoweler or Lamello. The dowels ensure that the parts do not move during subsequent screwing.
Additional dowels hold the panels in position when screwing them
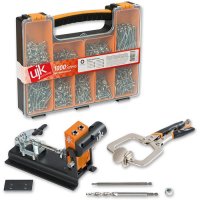
Parts 1, 2 and 3 are screwed with pocket holes. We used the UJK Pocket Hole Kit for this. Then the blind holes for the rods are drilled with a drill press or freehand. First screw the two T-track panels (parts 1 and 2). Make sure that they are mounted at right angles. Then place the rods in the blind holes and screw parts 3 and 4 in place (part 4 is simply screwed against part 1). Chamfer all edges with a sanding block (also those on the T-tracks!). This will protect you against cuts and injuries.

All screws are well concealed in pocket holes
Further applications
CAUTION! These operations are special operations where the top guard of the saw blade has to be removed. Please take particular care here! Immediately remount the top guard after finishing the workstep! Never work without this protection under normal circumstances.
You can only cut acute angles steeper than 45° on a circular bench saw if the workpiece is placed vertically on the machine table. The Multi T-track Clamping Device takes over the function of the machine table. You can slide lever clamps or hold down clamps into the T-tracks of the fence plate to secure the workpiece. Self-made stop blocks with horizontal clamps are also helpful and ensure secure clamping. Caution: The wedge-shaped section falls down and can get jammed in the gap of the saw table and fly off. Make sure you stand in a position where you cannot be hit by flying parts. Make sure that no other persons are in the danger zone.

This allows very acute angles to be cut on the circular saw
Machining small and narrow workpieces on a workbench with the router, but also with hand tools, often fails because of the non-existing clamping possibilities. This is where the MTS serves as a real problem solver. Its right-angled design allows it to be placed on a workbench top. The workpieces are held in the MTS by means of lever clamps, hold down clamps or quick-action clamps. We are sure you can think of even more ways to use the Multi T-track Clamping Device.

The MTS is also of versatile use on workbenches