Give your season’s greetings or birthday cards an individual touch. We are not talking about emails or electronic greeting cards, but good old postcards, preferably designed and printed by you! With lino printing you can design fancy motifs and print them yourself by hand. We show you how!
Relief printing
Lino printing is a classic printing technique in which the areas to be printed protrude. The ink is applied to these raised areas with a roller and the medium to be printed is laid on top. Pressure transfers the ink from the printing block to the medium. This technique is called relief printing. Other common relief printing processes are, for example, classical metal type or letterpress printing and xylography.
Material and tools
As the name suggests, in linocut the printing block is cut from linoleum. Linoleum is made from linseed oil, cork and wood flour and pine resin. It feels warm and soft to the touch, which is why, in addition to its use as a printing plate, it has again grown in popularity as a floor cover and for tabletops.
We use ESSDEE SoftCut™ Blocks in this tutorial. These are a little easier to work with for beginners. They are slightly softer than linoleum, but still allow details to be worked out without crumbling. Linoleum becomes dry over time. It can then break quickly and is liable to crack. The light surface allows you to sketch your designs directly on the SoftCut block with a pencil. In addition, the flexible material makes printing on curved surfaces possible (e.g. cups and plates) or can itself be slightly bent so that convex stamps can be made (e.g. for textile printing).
First, you will need cutting tools to carve out the printing block. A cutting knife and one or two gouges and V-tools will do.
There are simple sets where the blades have to be changed. These sets are sufficient for your first linocut try, but continually changing the blades quickly becomes annoying and the blades often cannot be resharpened well either.

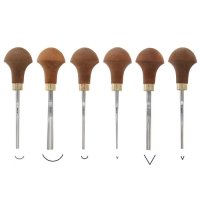
A small selection of gouges and V-tools is enough to start with
If you already have them, you can also use small standard carving tools. However, the long blades and handles are a bit awkward when cutting smaller curves. Short carving knives such as those in the Power Grip Carving Tool Sets are well suited. Perfectly suited for professional use are the short Pfeil® Linoleum and Woodcutting Tools. Set C, for example, comprises three gouges and three V-tools in different sizes. The blades have an optimal length for linocut and can be resharpened easily. The mushroom-shaped handle sits comfortably in the hand, so that the pressure on the blade is measured and details can be worked out easily.
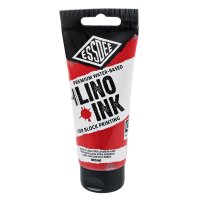
The ink type depends on the intended use and the medium to be printed (paper, cardboard, textiles, ceramics, etc.). For our greeting cards we use ESSDEE Lino Printing Ink in the basic colours blue, black, red and yellow. The colours can be mixed with each other so that you can easily create additional shades yourself (e.g. yellow + blue = green). The water-based lino printing inks have a short drying time and can be easily washed off your work utensils after printing.

The basic colours can be mixed to create further shades
For our greeting cards we use different papers as printing media. Normal office paper with 80 to 90 g is a bit too thin. Try paper from approx. 130 g. Different structures and colourings influence the printing results. Some papers are highly absorbent which causes the edges of the print look softer, others are smooth so the print looks sharp and glossy.
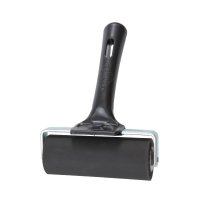
You will definitely need a rubber roller for printing. They are used to apply the ink to the raised areas of the printing block. The ESSDEE Ink Roller has a smooth, machine-ground surface and distributes the ink evenly. It is suitable for all water- or oil-based inks.
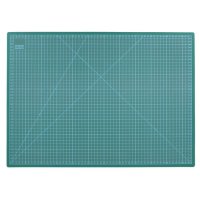
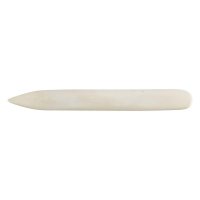
You will also need a palette and a spatula for mixing the ink, a ‘baren’ (rubbing tool) for pressing the paper onto the printing block, a cutter knife and a cutting mat as well as drawing utensils and various other bits. In a moment we will see what everything is needed for. To protect yourself and your clothes, we recommend that you wear an apron and rubber gloves when printing.
Basic technique
Design: Linocut is, as already described, a relief printing process. This means that you must remove the material from the linoleum or SoftCut™ blocks from those areas (lines and surfaces) that should not transfer colour to the medium. Or to put it the other way round, everything that is to be visible later must be left! In addition, the printed result is a reverse image of the printing block. For pictures without text this is usually no problem, but letters or numbers must be replicated accordingly.
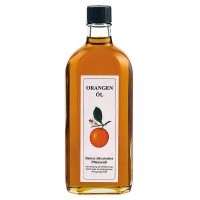
Transferring: You can draw your design directly on the light surface of the SoftCut™ blocks with a soft pencil. If you want to use a template from the internet, print it and use carbon paper to transfer it to the block. However, transferring very detailed templates is very time-consuming. Alternatively, put some orange oil on a cloth and rub the SoftCut plate thinly with it. Then place the copy or laser printout with the printed side on the block and rub the printout lightly. Peel off the print and let the orange oil evaporate. The toner comes off and remains on the SoftCut plate. Another advantage of this transfer technique: You can print the templates without having to mirror them.

Mit Orangenöl lassen sich Fotokopien übertragen
Hand position: It is important that the fingers of both hands are always behind the cutting edge! The pressure hand (usually the right hand) encloses the handle, pushes the blade, and sets the cutting direction. You can place the fingers of your other hand (left hand) on the blade for support and for some pressure from above. Always cut away from the body, if necessary, turn the printing block. If the pressure hand rests securely, cannot slip, and is possibly additionally secured by the other hand, a cutting movement (turning movement) towards the body can also be performed in exceptional cases.
Aids: Eine Holzplatte mit jeweils einer angeschraubten Leiste vorne (unten) und hinten (oben) (ähnlich einer einfachen Säge- oder Hobellade) dient als Anschlag und erleichtert das Halten des Druckstocks.
Cutting techniques: The angle at which the carving tool is positioned in relation to the surface of the block determines how quickly and how deeply the blade cuts into the surface. A steeply positioned blade cuts more aggressively into the SoftCut block than a flatly set one. If the blade is held too flat, it will only penetrate the surface with a lot of pressure from above and the cut edges will become sloppy.
First define the contours before removing the spaces. Contours are usually cut with a V-tool. Cut the contours along the drawn lines. If the lines are the edge of a surface, cutting is done directly along the line. If you want the contour to appear as a line afterwards, leave a small space between the contour and the line. You can also draw such contour lines with a thicker marker to determine the line thickness.
Everything that should not be printed must go. Gouges are used to remove the gaps. They take off more material in the width, but due to their flat rounded shape the contours quickly become sloppy. You can completely remove the material in the gaps, then these areas will be completely unprinted afterwards. Or you can leave small »remnants« of material to create a texture in the surface. Pay attention to the way you cut and use it to achieve different effects (e.g. furrows in the ground, rays of light, waves on water, etc.).
Printing technique: The paint is first spread on the palette and mixed and rubbed with a spatula or a painting knife until no more lumps are visible. Then roll out the ink and coat the rubber roller evenly. Now evenly spread the ink on the roller on the printing block. Place the paper on the printing block and press it evenly with a baren or a clean rubber roller. Make sure that the paper does not get out of place. Leave the paper on the printing block for a short time before carefully pulling it off. Hang the print to dry or place it on a drying rack.

Carefully lift the paper from the printing block
Three motifs – three exercises
You can see how the individual exercises or motifs are implemented in our video. Here is just the basic information.
1. Star
In this motif, you get to know the tools and can try out how the materials behave. Draw several stars on the printing block with a marker. First cut out the contours of the stars with a V-tool and remove the material in the gaps with a gouge. Now you can work the surfaces of the stars with the different carving tools. Use the V-tools to cut different line patterns and hatchings. Use the gouges to create different structures and patterns. Then try the result with several colours in print. Rotate and move the printing block so that the stars are in a different position for the second and third printing. Make experiments and gain experience.

2. Winter landscape
We produce two-colour prints with only one printing block. With this technique, the printing block is further processed after the first printing, the areas to be printed are reduced or only the contours remain. In the second printing pass, the ink applied first is then overprinted. This technique is also used in other printing techniques to give black areas a better opacity.

3. Fireworks
Conjure up a firework of colours on paper with the »rainbow roller«. You can also apply the ink directly to the paper with the ink roller. If you apply two or three shades next to each other on the palette and roll them out, smooth transitions between the colours are created. The actual motif is then printed onto this colour base in a contrasting colour (black or white). (Author's note: take light shades, e.g. yellow and red, to colour the paper and then print dark colours (blue or black) over them. The result will then be better than in the video.)