As the days get shorter, there is less to do in the garden. Use this time to prepare your garden tools for their winter rest. Protect your tools from the cold, wet weather and store them in a well-maintained condition. By doing this, your tools will not only last longer – they will be ready for use again in the spring. As part of the overwintering prep, clean your garden tools, remove dirt and rust, sharpen and maintain them.
Clean your tools

We recommend cleaning your garden tools after each use.
The first step is to clean your garden tools. If you always clean them immediately after use, this first step is quickly done and you can go straight to the next step.
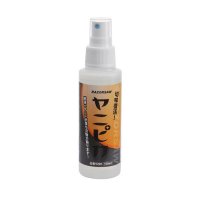
First brush off coarse dirt from the tool. For saws or files, a saw and file brush helps to remove the dirt. Resin residues on the blade or tool can be removed without effort using a resin solvent: Spray on the resin solvent, let it work for a short time – and simply wipe it off together with the dissolved resin. Cleaning saws, or more precisely saw blades, with resin solvent is a breeze. After wiping off the resin solvent, you should apply some oil to neutralise the solvent.
Particularly feared is the notorious lawn/soil mixture jamming your lawn mower. Before you try to lever it away with a screwdriver, it is better to get hold of a high-pressure cleaner. But be careful with the high-pressure cleaner that you do not loosen or even destroy any parts of the panelling. Nevertheless, using a high-pressure cleaner is preferred to using a screwdriver.
Once the coarse dirt has been loosened, tackle the remaining dirt with a sponge, warm water and a little soap and clean your garden tools thoroughly.
Garden shears are quickly cleaned with the Barnel® »B Clean« cleaning spray, which has been specially developed for this purpose. This spray reliably removes resin residues and sticky tree sap. Just as with resin solvent, the garden shears should be given a little oil after cleaning to neutralise the solvent.
Check your tools and repair damage

A wide variety of tools are used to remove rust.
In the second step, check your garden tools for possible damage that needs tackling. For example, small rust spots tend to get worse during the winter. Take your time having a closer look! This applies primarily to tools made of carbon steel, including saws or knives. Stainless steel is usually unproblematic, as only some rust film adheres to it.
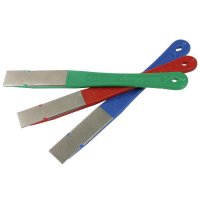
Smaller rust spots can easily be »erased« with a rust eraser. You can work on larger areas with a steel wire brush or even a flap sander. Flap sanding discs can also be used with a drill if you do not have a straight grinder to hand. If you are not familiar with flap sanding discs, you should try them out on less valuable tools first.
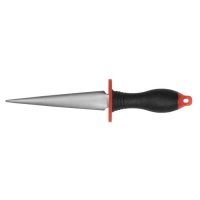
If components such as joints or bolts are so rusted that they have become stuck, you should not use brute force to try to separate them. Sprayed with Weicon® rust loosener and contact spray, these parts will come off reliably. You can then proceed with further rust removal.
It’s not just metal parts that need maintaining – the handles of your garden tools also require some care. If the handles are already starting to rot, now is the right time to buy new and discard the old ones. Sand handles which are still in good condition with fine abrasive paper. Then treat them with a slow-drying oil such as linseed oil. The slow drying process allows it to penetrate deep into the wood. After curing, it is an ecological wood preservative.
Sharpen your tools
We recommend you sharpen your shears and axes now, so that you can immediately get back to work with sharp tools in the spring. Not only will it allow you to get started in the garden right away next season - you also reduce the risk of injury, even if this sounds somewhat odd at first. The fact is, however: The sharper a tool is, the less force is needed and the more sensitively you can guide the tool. This reduces the risk of injury.
Depending on the category of garden tool, you can choose between different sharpening systems.
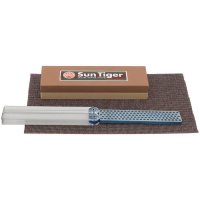
Our sharpening set for pruning shears and scissors contains a coarse honing file, a fine file and a small Ballistol spray. The Naniwa sharpening stones are particularly suitable for sharpening garden shears. These are concave on one side and convex on the other.
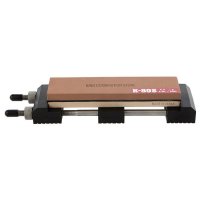
For axes and hatchets, there is the Gränsfors® sharpening file or the Gränsfors® diamond sharpening file. The diamond file has a coarse 230 grit on one side for rough grinding and a 400 grit on the other side for honing. Both files can be used with water or dry, depending on your preference. If you appreciate precise sharpening angles and want to achieve them comparatively easily, then you should take a look at the KME sharpening system for axes. This system allows the sharpening of axes and hatchets even without prior knowledge.
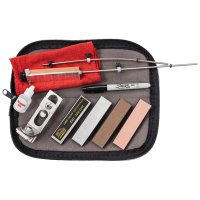
If you are a beginner and want to get to grips with sharpening knives and tools, we recommend our set consisting of a combination stone, a Diafold sharpener and oil. In addition to the sharpening stone, you will also find a no-skid mat and a coarse all-purpose sharpener in the set, as well as a bottle of Sinensis camellia oil.

Use the coarse side of the diamond sharpening file for rough grinding and the fine side for honing.
Lubricate your tools
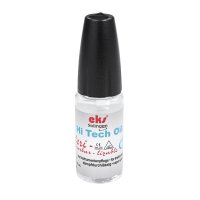
After you have cleaned, repaired and sharpened your garden tools, you should oil all metal parts thoroughly. If possible, use only vegetable oils such as Japanese camellia oil or Sinensis camellia oil. Similarly, Ballistol, which is based on medically pure white oil, is a good vegetable oil. Unlike mineral oils, vegetable oils are biodegradable and thus harmless to use. By oiling the surface, you protect it from unnecessary corrosion: Water finds it difficult to penetrate the metal surface – the oil layer displaces the water.
Store your tools in a dry and frost-free environment

A dry shed is suitable for many garden tools in winter.
Under no circumstances should you leave your tools outside over the winter. Your equipment is happiest in a dry and frost-free environment. For this purpose, you can store your tools in the garden shed, in your tool shed or in the basement. The garage is also a suitable winter home. Outside – this includes the area under the roof overhang on the patio – your tools would suffer unnecessarily. If necessary, you can also pack your gardening tools in moving boxes and store them in the guest room or attic.
Ideally, store your equipment at temperatures well above 0 degrees. This applies in particular to devices with rechargeable batteries.
After storing all your equipment, think about your irrigation system and any water pump you may have. You should fully drain these and store them so they are protected against frost.