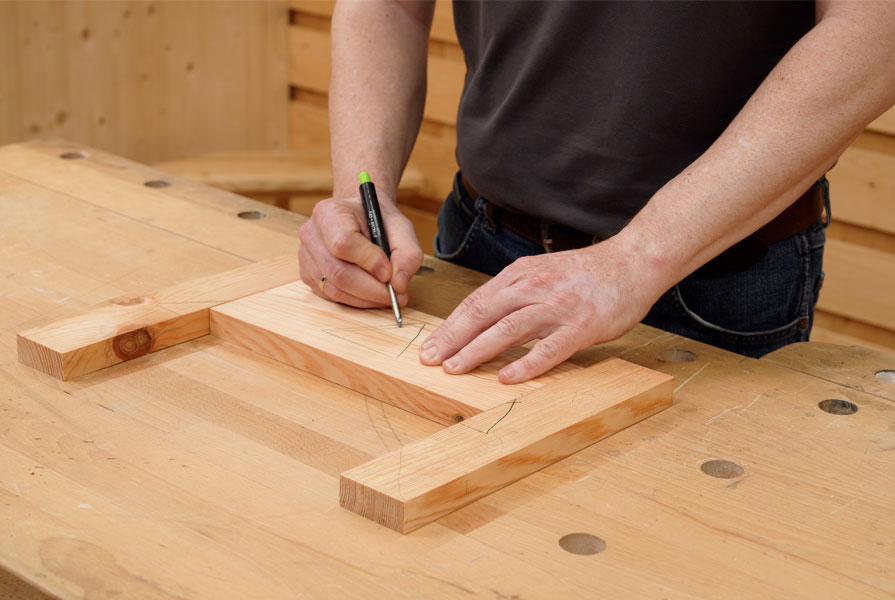
Experienced carpenters mark their workpieces with different guide marks. This starts with the selection of suitable boards and planks in their timber store and continues throughout the entire project right up to assembly.
What is the purpose of marking systems such as the cabinetmaker's triangle?
In the course of any project, guide marks fulfil different tasks. If several people are working on a project, numbers and lines are a simple means of communication. First of all, they mark which piece of wood is to become which part in the workpiece serving as identification. As a project progresses, they help to document the machining condition to optimise the workflow. Markings such as the cabinetmaker's triangle clearly show where which part belongs in the workpiece and thus provide orientation. Small marks and simple lines often help to prevent mistakes. All this together saves time.
In the following we present different marking systems in the order in which they are used in the course of the project.
Marking the parts
During material selection, but at the latest when rough cutting, boards and planks are marked by numbers in a circle. Each number represents a position on the parts list. Draw the part mark onto the face of the wood so that it remains on the workpiece as long as possible and is still visible after trueing and joining. For marking rough end grain, weatherproof marking chalk for example, is ideal. However, these markings are also lost at the latest when the parts are cut to their final size. Then simply transfer the number in the circle onto a piece of adhesive tape (painter's masking tape or Washi tape), which will usually remain on the part until it is mounted.
The number in the circle indicates which part it is
Advantages: Once you are familiarised with this marking system, you can assign numbers to all parts of the workpiece at the blueprint stage. This gives you a good overview of your material right from the start.
Marking the reference surface
In the next step, the material is trued and joined by hand or by machine. This creates both a flat surface that will now serve as a reference surface and a straight edge at right angles to it, the joint edge. The planed surfaces and edges do not need to be further processed in this step, they serve as a reference for planing to thickness and cutting to width. For this purpose, they can be given a joint mark. A simple way to do this is to draw two lines across the edge that join to form a point. The tip points in the direction of the grain so that you can remove the marking later without tear-outs with a few light planing strokes.
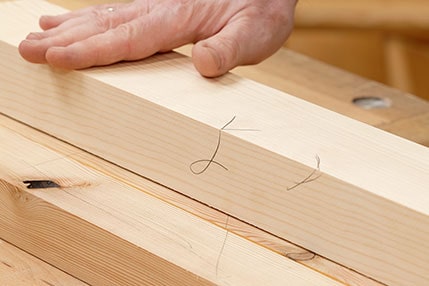
The marked edges and surfaces are trued at right angles
Advantages: To save time, especially when working by hand, reference edges and surfaces are not processed further for the time being. When marking out, all measuring tools are positioned according to this reference as far as possible, which ensures accuracy.
Cabinetmaker's triangle
After cutting to final size, the formatting, we may finally use the cabinetmaker's triangle. When everything is prepared enough for you to start working on the joints, all the workpiece parts are examined again in detail. Specify which side of a piece should face forward and in which direction the grain structure should run. Also consider on which side, front or back, the cabinetmaker’s triangle will last the longest. Now you can arrange all the parts where they should be installed in the finished workpiece and mark them with the cabinetmaker's triangle.
The basic principle of the cabinetmaker's triangle is quite simple: Draw one section of your triangle on each piece so that all the pieces together form a closed triangle. There are always at least two lines on every part that allow the workpiece to be clearly aligned.
Advantages: The cabinetmaker's triangle makes it easy to see the orientation and position of each part, its inside and outside, front and back. This helps with marking and making the joints as well as with surface finishing and assembly.
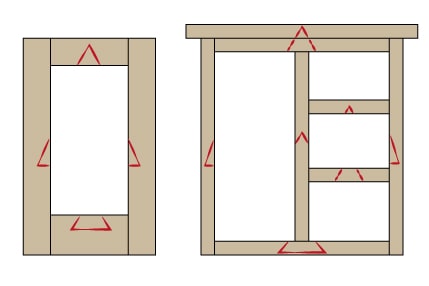
The cabinetmaker's triangle on simple and on complex workpieces
Variants of the cabinetmaker's triangle
If parts are to be arranged parallel to each other in a certain position, for example when glueing boards, using a normal cabinetmaker's triangle parts doesn’t align the parts precisely. In this case, go for a triangle with a vertical side or the classic shape of the cabinetmaker’s triangle with an added centre line.
Advantages: Even if some parts are going to be worked on further (e.g. joining the edges with a plane), the vertical line offers a good possibility to align them accurately again later.
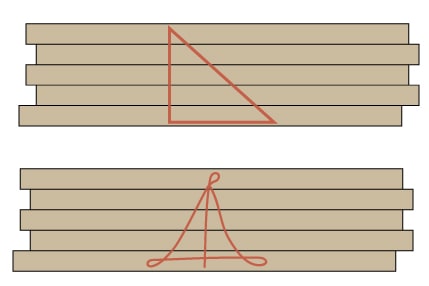
The parts are precisely aligned with the vertical line
Mark the waste parts
A really simple but extremely useful tip is to mark the waste parts. Nothing is more annoying than having sawn on the wrong side of the mark or having chiselled out tenons instead of dovetails. We therefore highly recommend you mark the waste parts or the area that is to be omitted or chiselled out with a few slashes or a cross directly when marking out.
Advantages: It is clearly visible on which side of the mark to saw, chisel or drill.
Position marks
Position marks perform a similar task. There are many situations where one mark alone does not clearly show the position of the part. This is the case for example when positioning intermediate floors. If you have marked the position of the floors with marks on the side walls, the respective line can mark the top or bottom edge of the intermediate floor. In our experience, it is very helpful if you draw a mark, e.g. a cross, exactly where the floors will sit afterwards. The cross will be hidden by the correctly positioned floor. When working with joining systems such as the Festool Joining Machine DOMINO or the MAFELL DuoDoweler, you can place the intermediate floors on the mark as an auxiliary stop. If the cross is visible, you know that you are drilling or milling on the right side of the mark.
Advantages: The position mark is visible when drilling and milling and is a clear sign that you are working on the right side of the marks. In the finished workpiece, the markings are hidden and therefore do not have to be ground away.
Mark outside corners
When working with joining systems, it is also helpful to mark the outer sides at the corners that will be joined with Lamello, Domino or other connectors. The stops of most joining systems are aligned to the outside of the workpieces so that the parts are flush on the outside. It is therefore helpful to mark the outer sides at all corners, for example with a double line. This way you can see at once which side is the inside or outside and can always correctly align the joining.
Advantages: Especially when producing several similar workpieces at the same time, it is likely for parts to be incorrectly used upside down. Marked outer corners ensure that you always drill or mill on the correct side.

