»Lateral adjustment« means setting the plane blade in the right position sideways. After choosing the chip thickness, it is used on most planes to align the cutting edge of the blade parallel to the plane sole so that a uniformly thick chip can be removed across the entire width of the plane.
What are the options of lateral adjustment?
With most wooden planes (e.g. the Ulmia Smoothing Plane), once the chip thickness has been set, the plane blade is tilted sideways by tapping on its rear end. Only a few models have a lever for lateral adjustment, which, however, only allows very coarse settings for wood planes. They are also fine-tuned by means of a plane hammer.

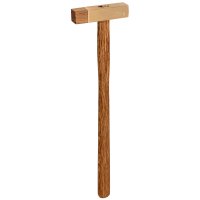
A hammer is needed to adjust most wooden planes
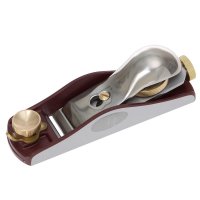
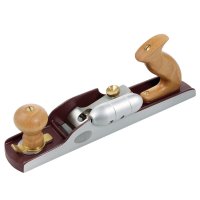
Metal planes often have a lever mechanism for lateral adjustment. There are two different designs. Stanley/Bailey planes have a lever that engages in a long longitudinal slot in the plane blade. Norris planes have a combined mechanism of chip thickness adjustment and lateral adjustment. With both, due to the clearance in the adjustment mechanism, the lever adjusts the blade only to a certain accuracy. The more precise adjustment is done with an adjustment hammer by lightly tapping the side of the blade. Metal planes without a lever mechanism are adjusted like wooden planes, with a plane hammer.

Two different adjustment mechanisms for metal planes
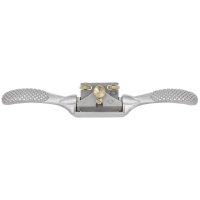
Another adjustment option can be found on spokeshaves. Many metal spokeshaves have two adjusting nuts on the left and right of the plane blade. With these nuts, the chip thickness can be adjusted separately on the left and right, and the blade can be tilted sideways.

The screws on the spokeshave regulate chip thickness and parallelism in one
Why does the blade have to be set exactly parallel to the plane sole?
If the blade is at an angle in planes used to join stock edges, the edge will become more and more slanted as it is planed. In the case of smoothing planes, an inclined blade would leave clearly visible planing marks or longitudinal edges on the surface, which originate from the deeper corner of the plane blade.
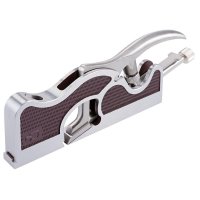
With shoulder planes the blade must actually be moved sideways and not just tilted. The shoulder plane also only works perfectly if the cutting edge is set parallel to the plane sole. For an exact inside corner (rebate), one corner of the cutting edge must protrude minimally over the plane body at the side. The cutting edge of a shoulder plane is therefore wider than the plane sole. Even if the cutting edge is just flush with the plane sole edge, there will be a lateral step when planing and the rebate will not be exact. To move the blade in shoulder planes, it is necessary to strike not only the rear end of the blade, but also its front. This is especially true for wooden shoulder planes, because with them it is impossible to loosen the clamping of the blade without changing the settings. Use a soft-face hammer made of wood, brass or hard plastic for setting.
However, there is also the case that the plane blade is deliberately set at an angle. With spokeshaves, for example, this allows chips of different thicknesses to be removed, depending on which point of the plane blade is used for planing. Rough work takes place with the end that has been set deeper. Without having to adjust the blade, you can then do the fine work with the other side.
How do I check the lateral setting?
Adjusting a plane should never be done on the workpiece if you don't want any nasty surprises. First just eyeball the chip thickness and the rough parallelism of the blade respective to the plane sole. To fine-tune the chip thickness, clamp a sample piece of wood with a not too wide edge in the workbench. Remove chips with the centre area of the cutting edge and set the desired chip thickness. Afterwards, you can also fine-tune the parallelism on this sample wood. To do this, move the plane to the right to remove a chip with the extreme left end of the cutting edge. Do the same with the plane shifted to the left. The difference in chip thickness at these points shows you in which direction the blade needs to be adjusted with the hammer. Take off a few chips again with the centre area and repeat the procedure until a chip of the same thickness is removed on both sides.
Another way of checking is to use a thin piece of wood which you move over the sole of the plane and over the cutting edge at different points. The resistance shows you, at which points the cutting edge protrudes further or less from the plane sole. Adjust the blade until the same resistance is felt at both ends of the cutting edge.